Building Automated Microsoft 365 Update Newsletters with Copilot Studio Agents
Keeping customers informed about Microsoft 365 changes is a recurring, time-consuming task for any managed service provider or IT team. Message Center updates, roadmap changes, and deprecations need to be tracked, filtered for relevance, and rewritten into something a non-technical customer can actually use — every single week.
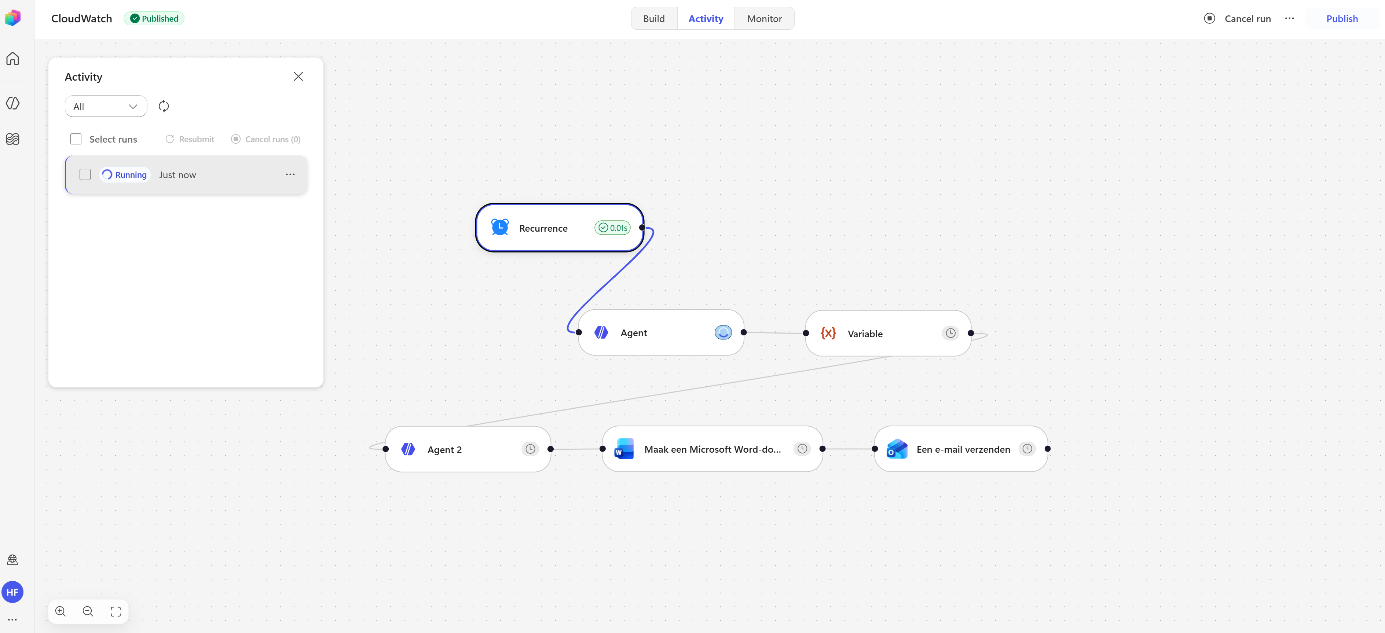
This post walks through a Copilot Studio workflow that automates the whole pipeline: one agent monitors and gathers the latest Microsoft 365 updates, a second agent turns that raw output into a polished, customer-facing newsletter, and the workflow finishes by generating a Word document and emailing it out for review.
How the Workflow Is Structured
The workflow uses two AI agents, each with a distinct job:
- Agent 1 monitors and gathers the latest Microsoft 365 updates using configured knowledge sources and web search.
- Agent 2 takes Agent 1’s output and reformats it into a professional newsletter suitable for customers.
- The workflow then generates a Microsoft Word document from Agent 2’s output, which can be reviewed before it goes out to customers.
Automating this removes the manual research-and-write cycle entirely — the workflow does the legwork, a human just reviews the draft before it’s sent.
Step 1: Create the Workflow
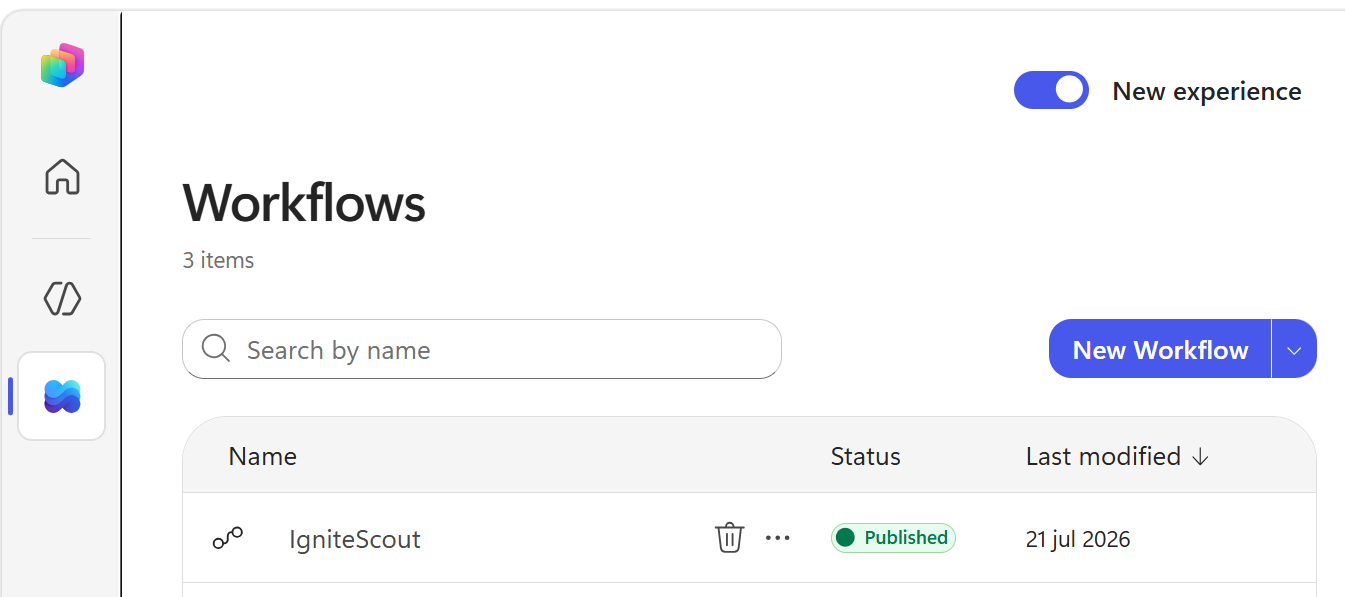
Log in to Copilot Studio and select Workflows.
Step 2: Configure the Trigger
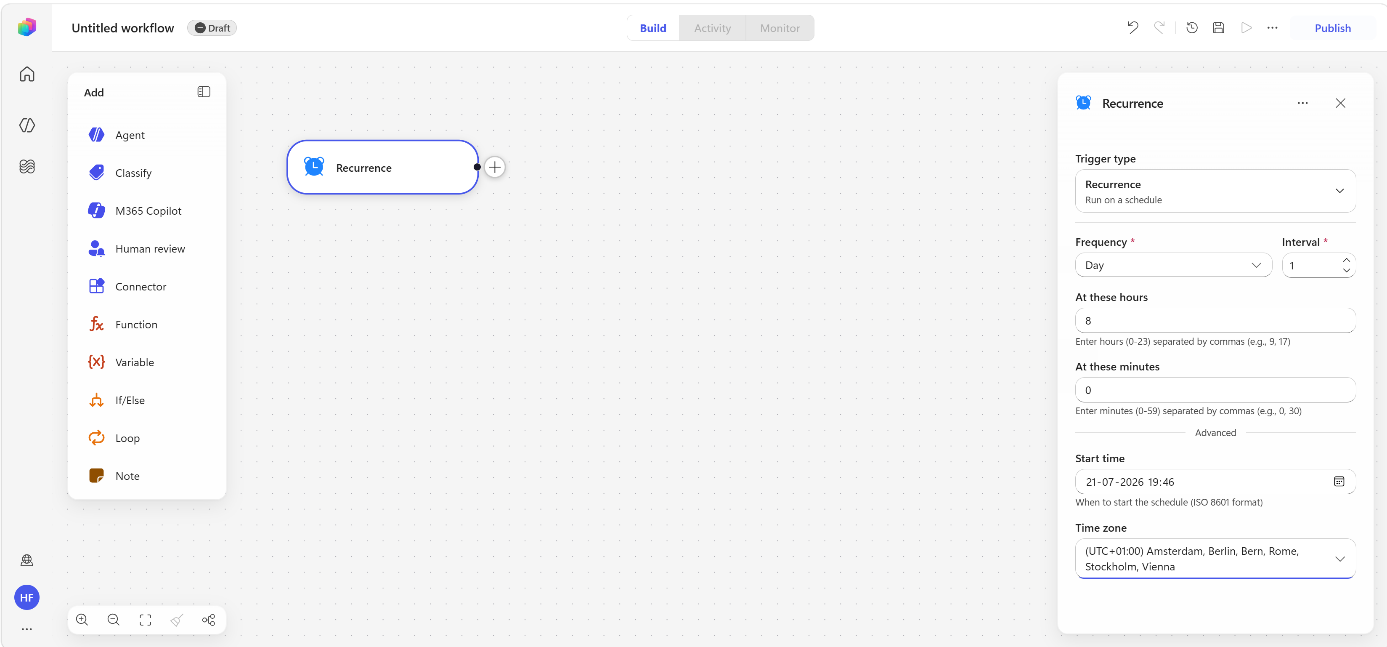
Click the start trigger and configure it as a Recurrence trigger:
- Trigger type: Recurrence
- Frequency: Day (choose according to your preference)
- At these hours: 8
- Start time: your preference
- Time zone: your preference
Step 3: Configure Agent 1 — Gathering Updates
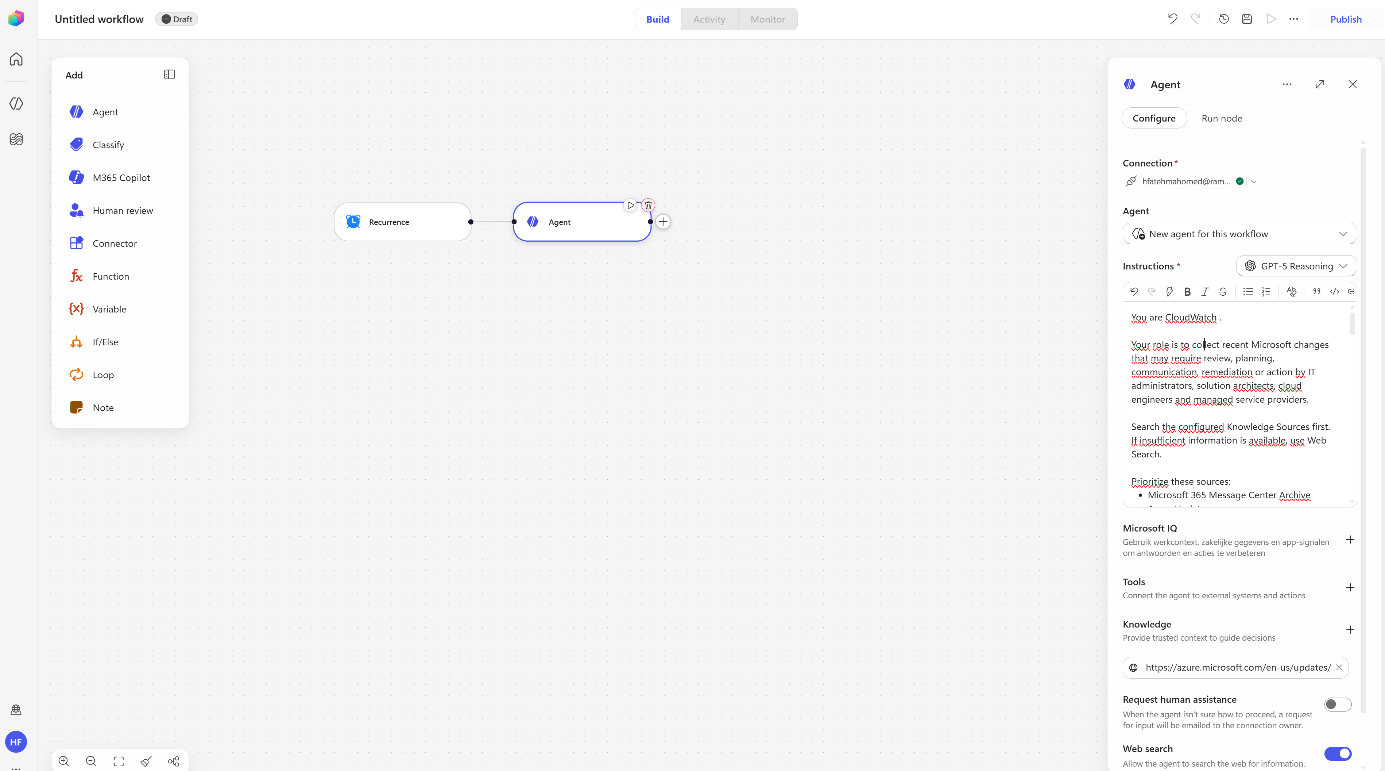
Add an Agent node and click the connection field to create a connection — the agent runs under your own user context. Give it a prompt, attach your knowledge sources, and turn on web search so it can supplement those sources with current information.
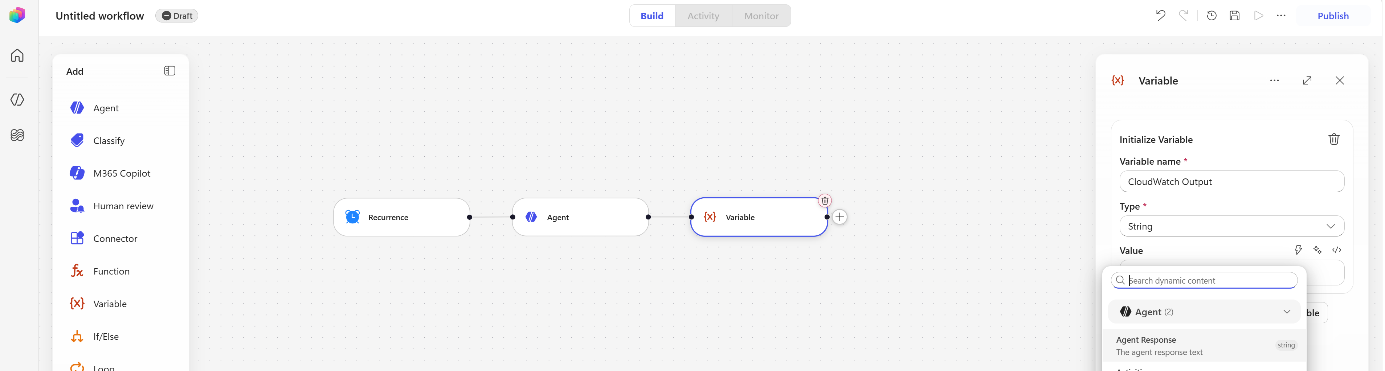
Next, add a Variable node to capture the agent’s output:
- Variable name:
CloudWatch Output - Type: String
- Value (Dynamic Content): Agent Response
Step 4: Configure Agent 2 — Drafting the Newsletter
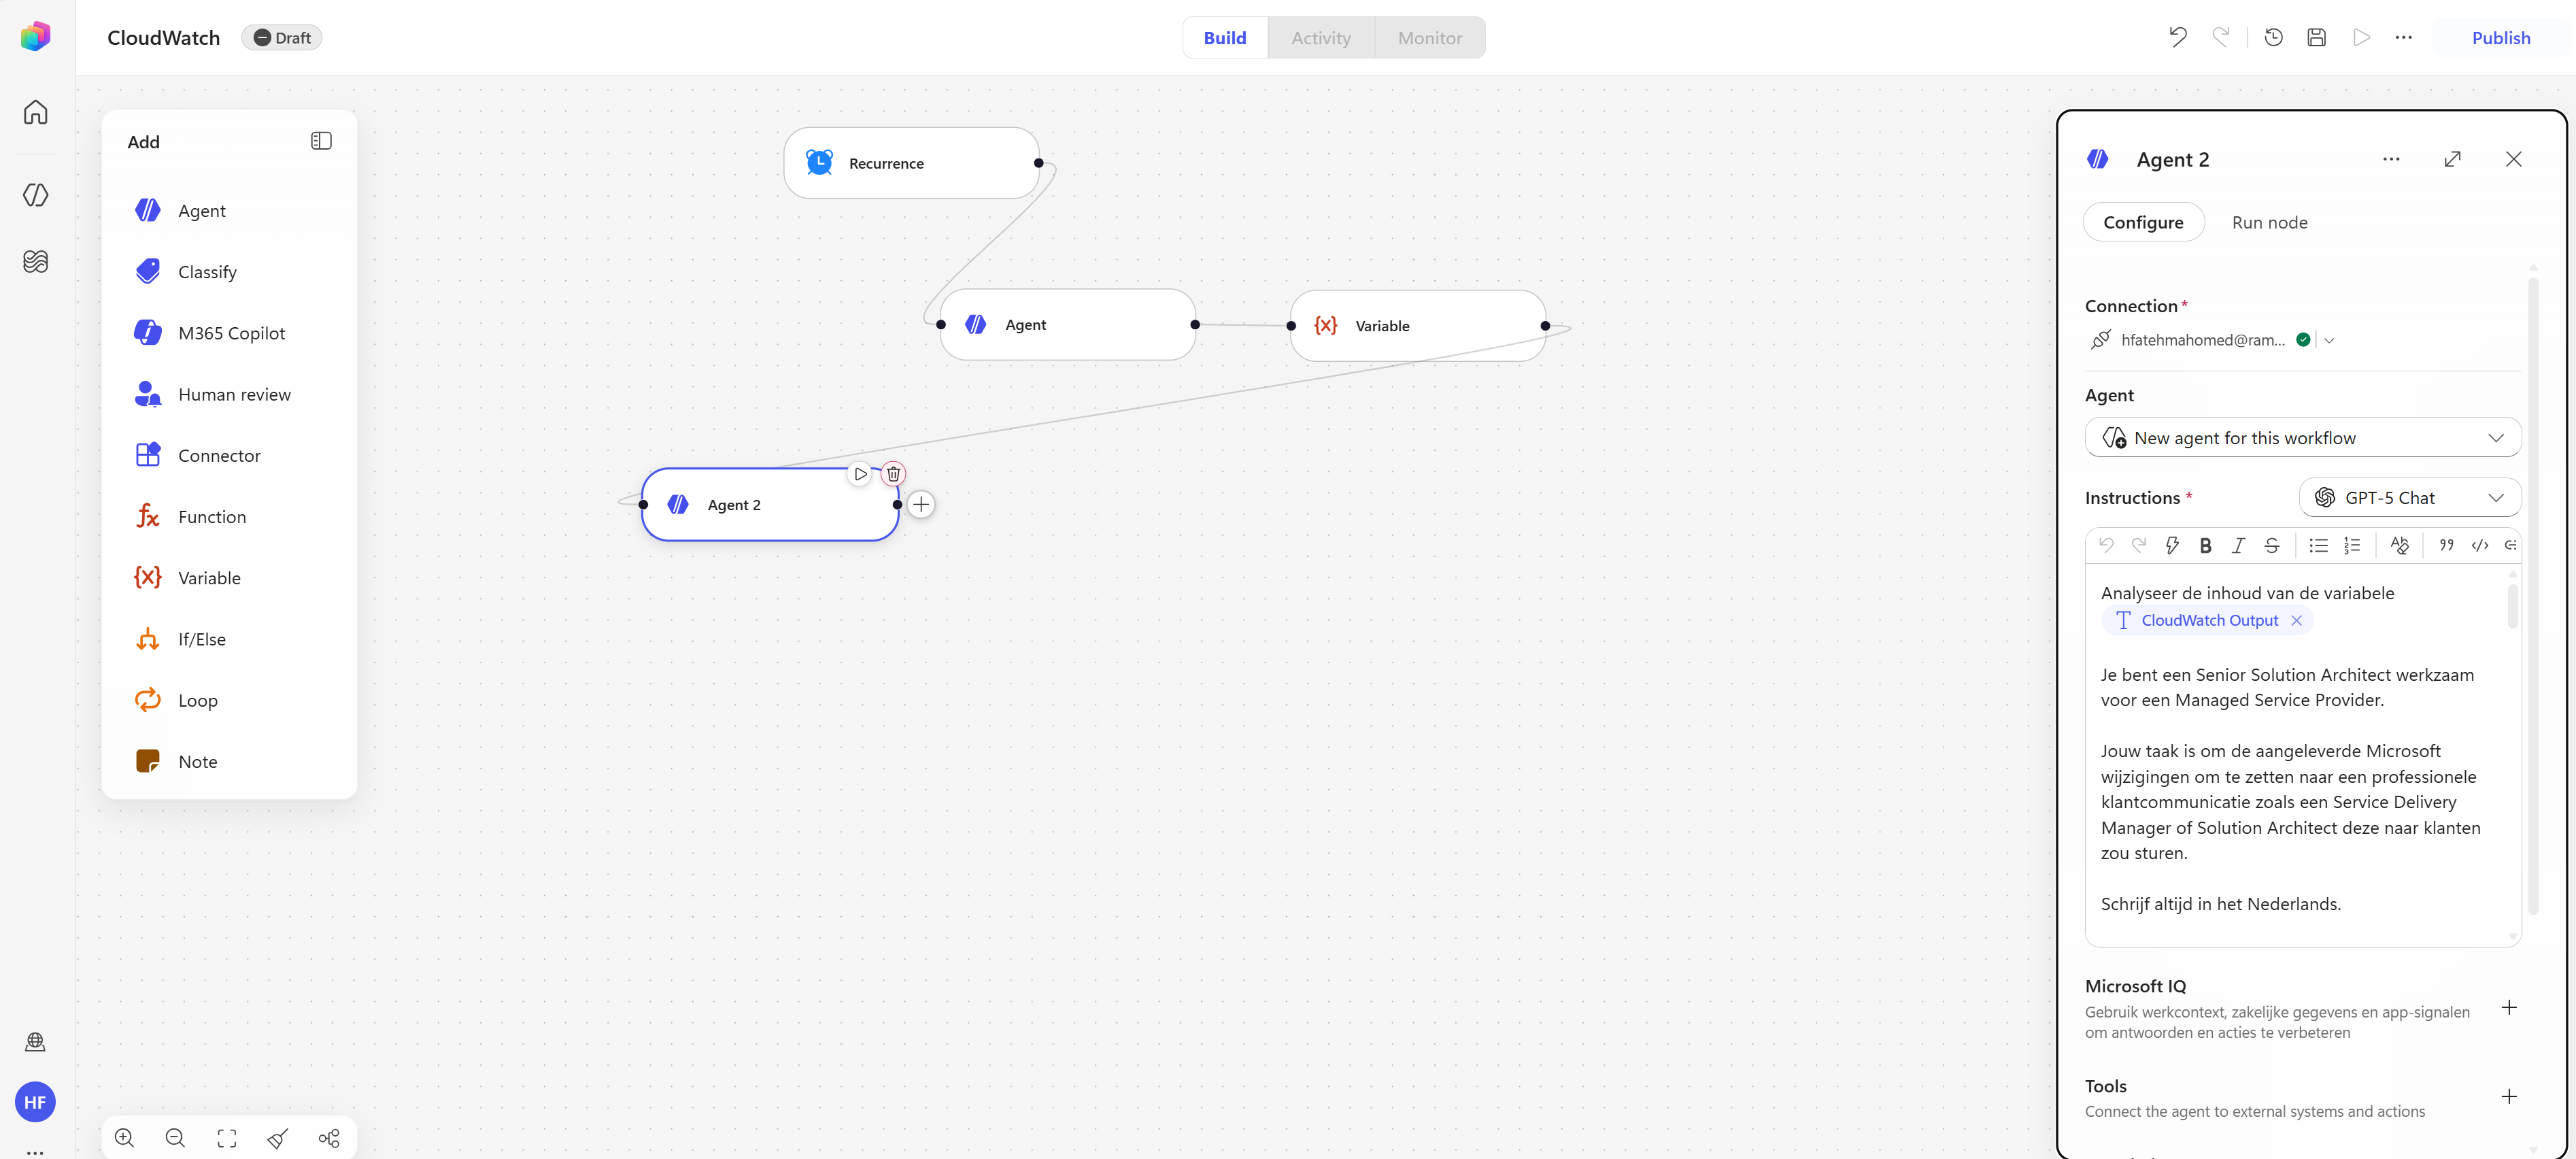
Add a second agent that consumes the output of the first and turns it into a customer-ready letter. In its instructions, reference the CloudWatch Output variable directly and tell it to analyze that content — this agent should also write the intro and closing, with the body built from the updates in the variable.
This agent doesn’t need web search — it’s only reformatting content Agent 1 already gathered.
Step 5: Generate the Word Document
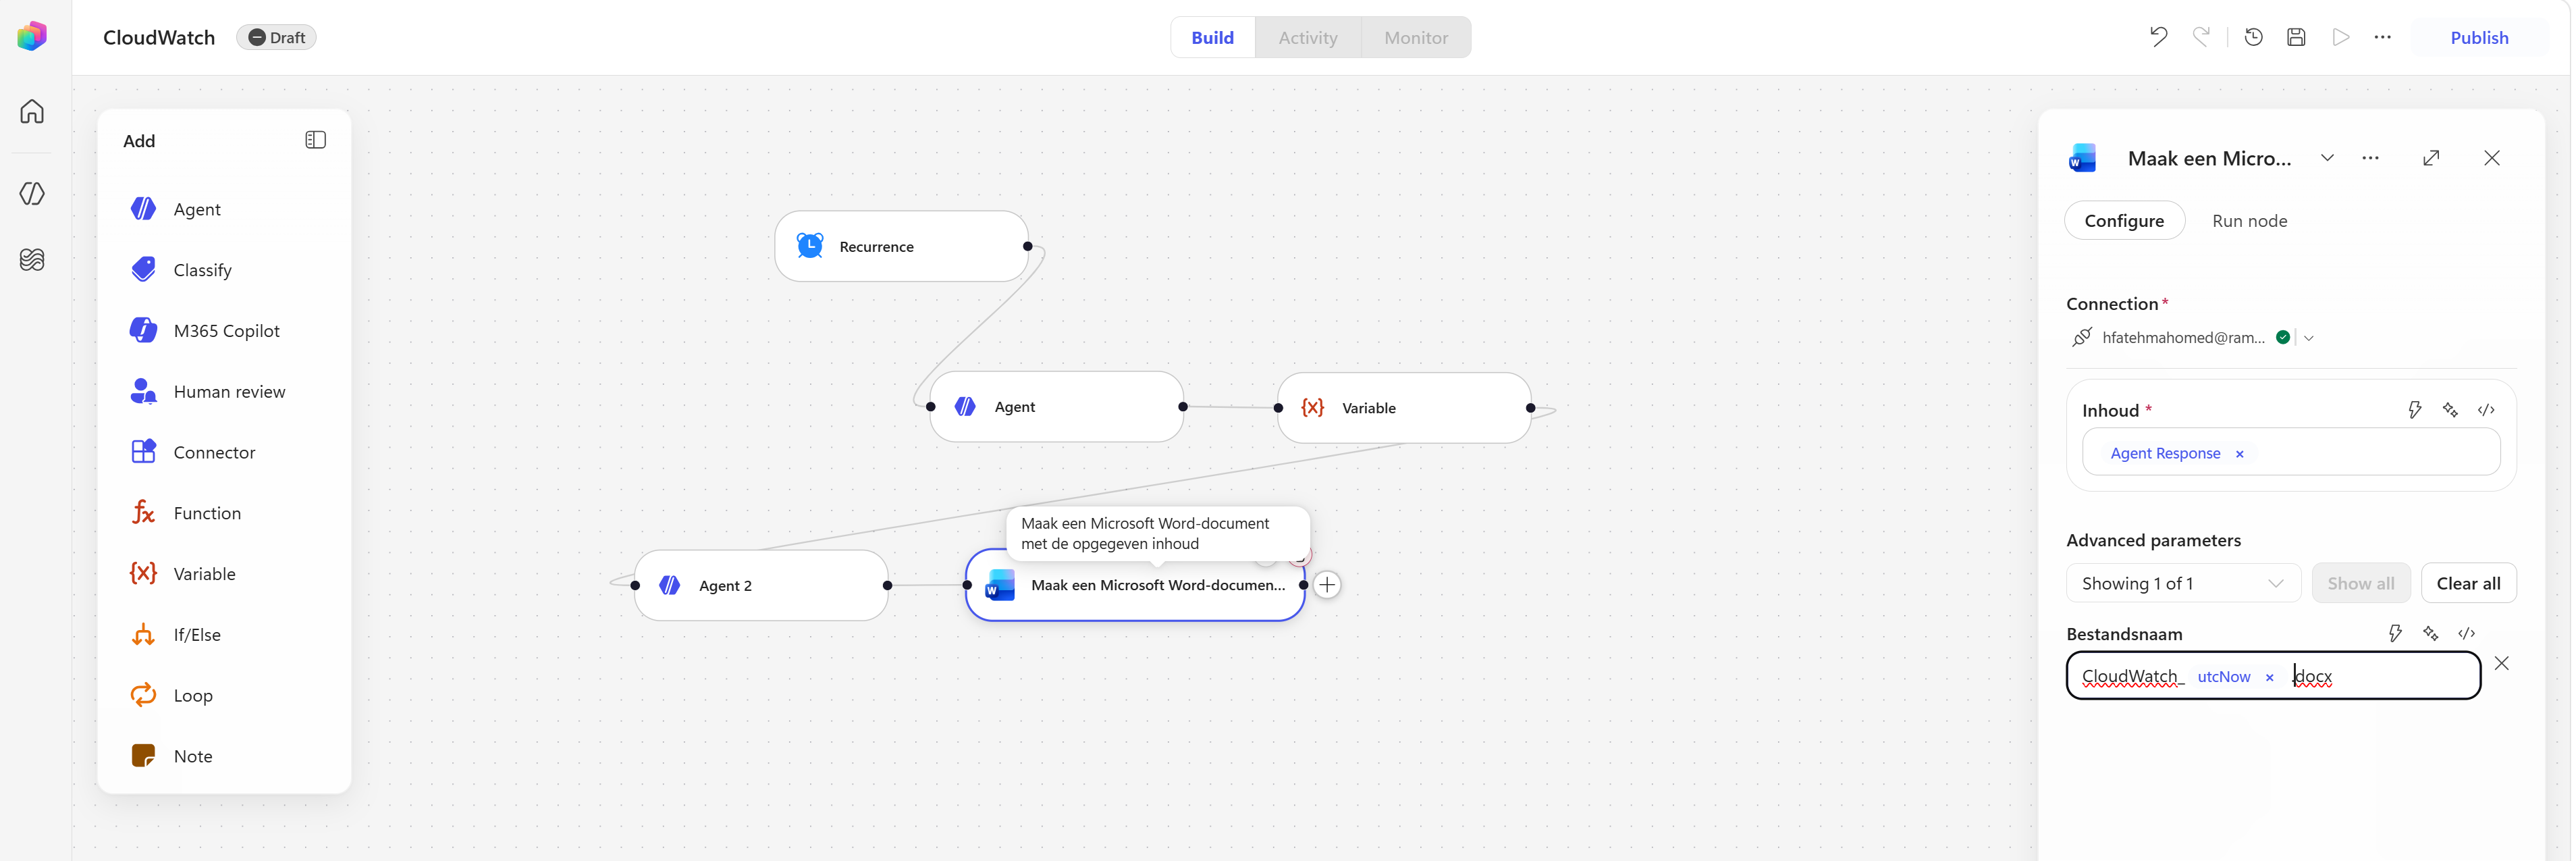
Add a “Create a Microsoft Word document with the specified content” action:
- Content (Dynamic Content): Agent 2 Response
- File name: give it a name
Step 6: Send the Review Email
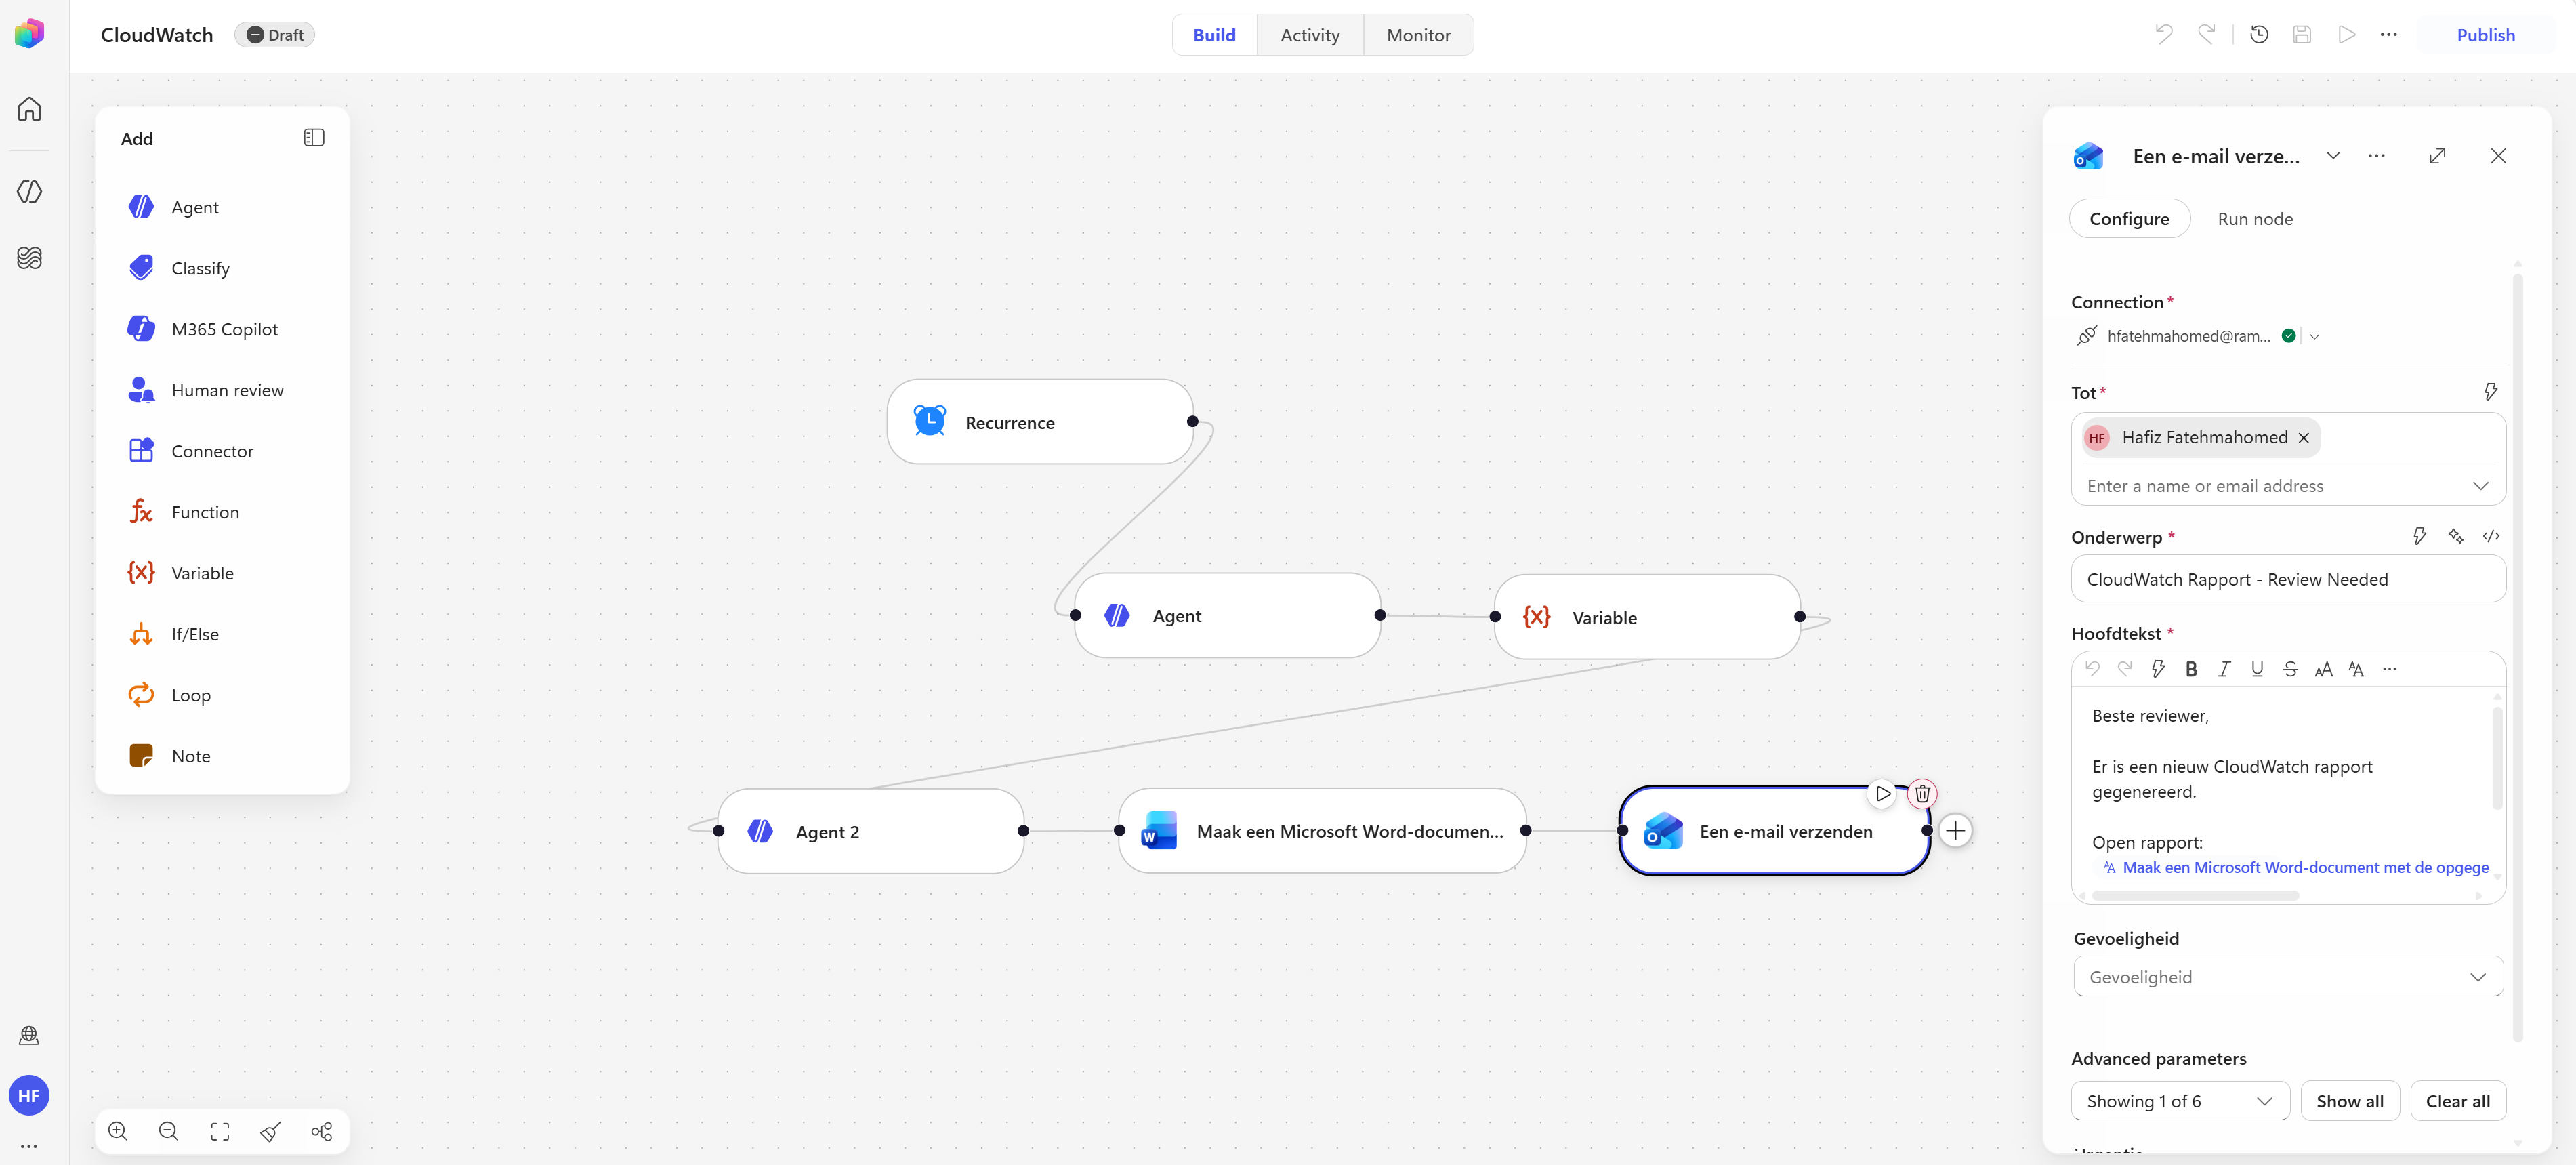
Add a “Send an email” action, addressed to yourself (or whoever reviews the draft before it goes to customers), with a subject and body of your choosing.
Step 7: Save, Publish, and Run
Save and publish the workflow, then run it to check the output.
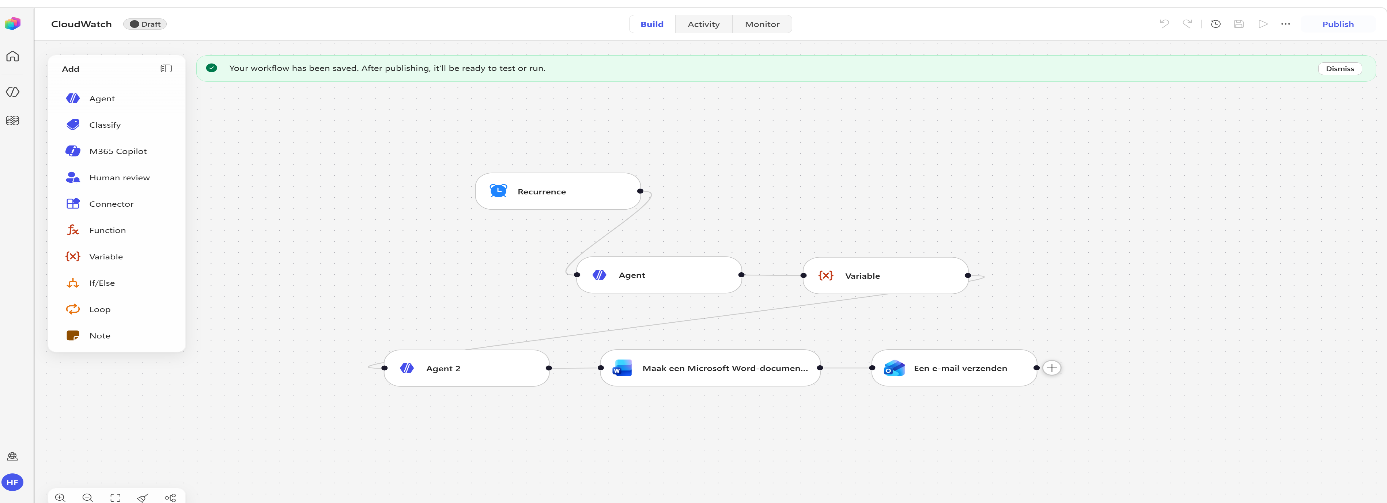
From the Activity tab, click into a run to see step-by-step what each node is doing as it executes.
Step 8: Review the Newsletter
Once the run completes, you’ll receive an email linking to the generated Word document. Open it to review the newsletter Agent 2 produced from that run’s Microsoft 365 updates:
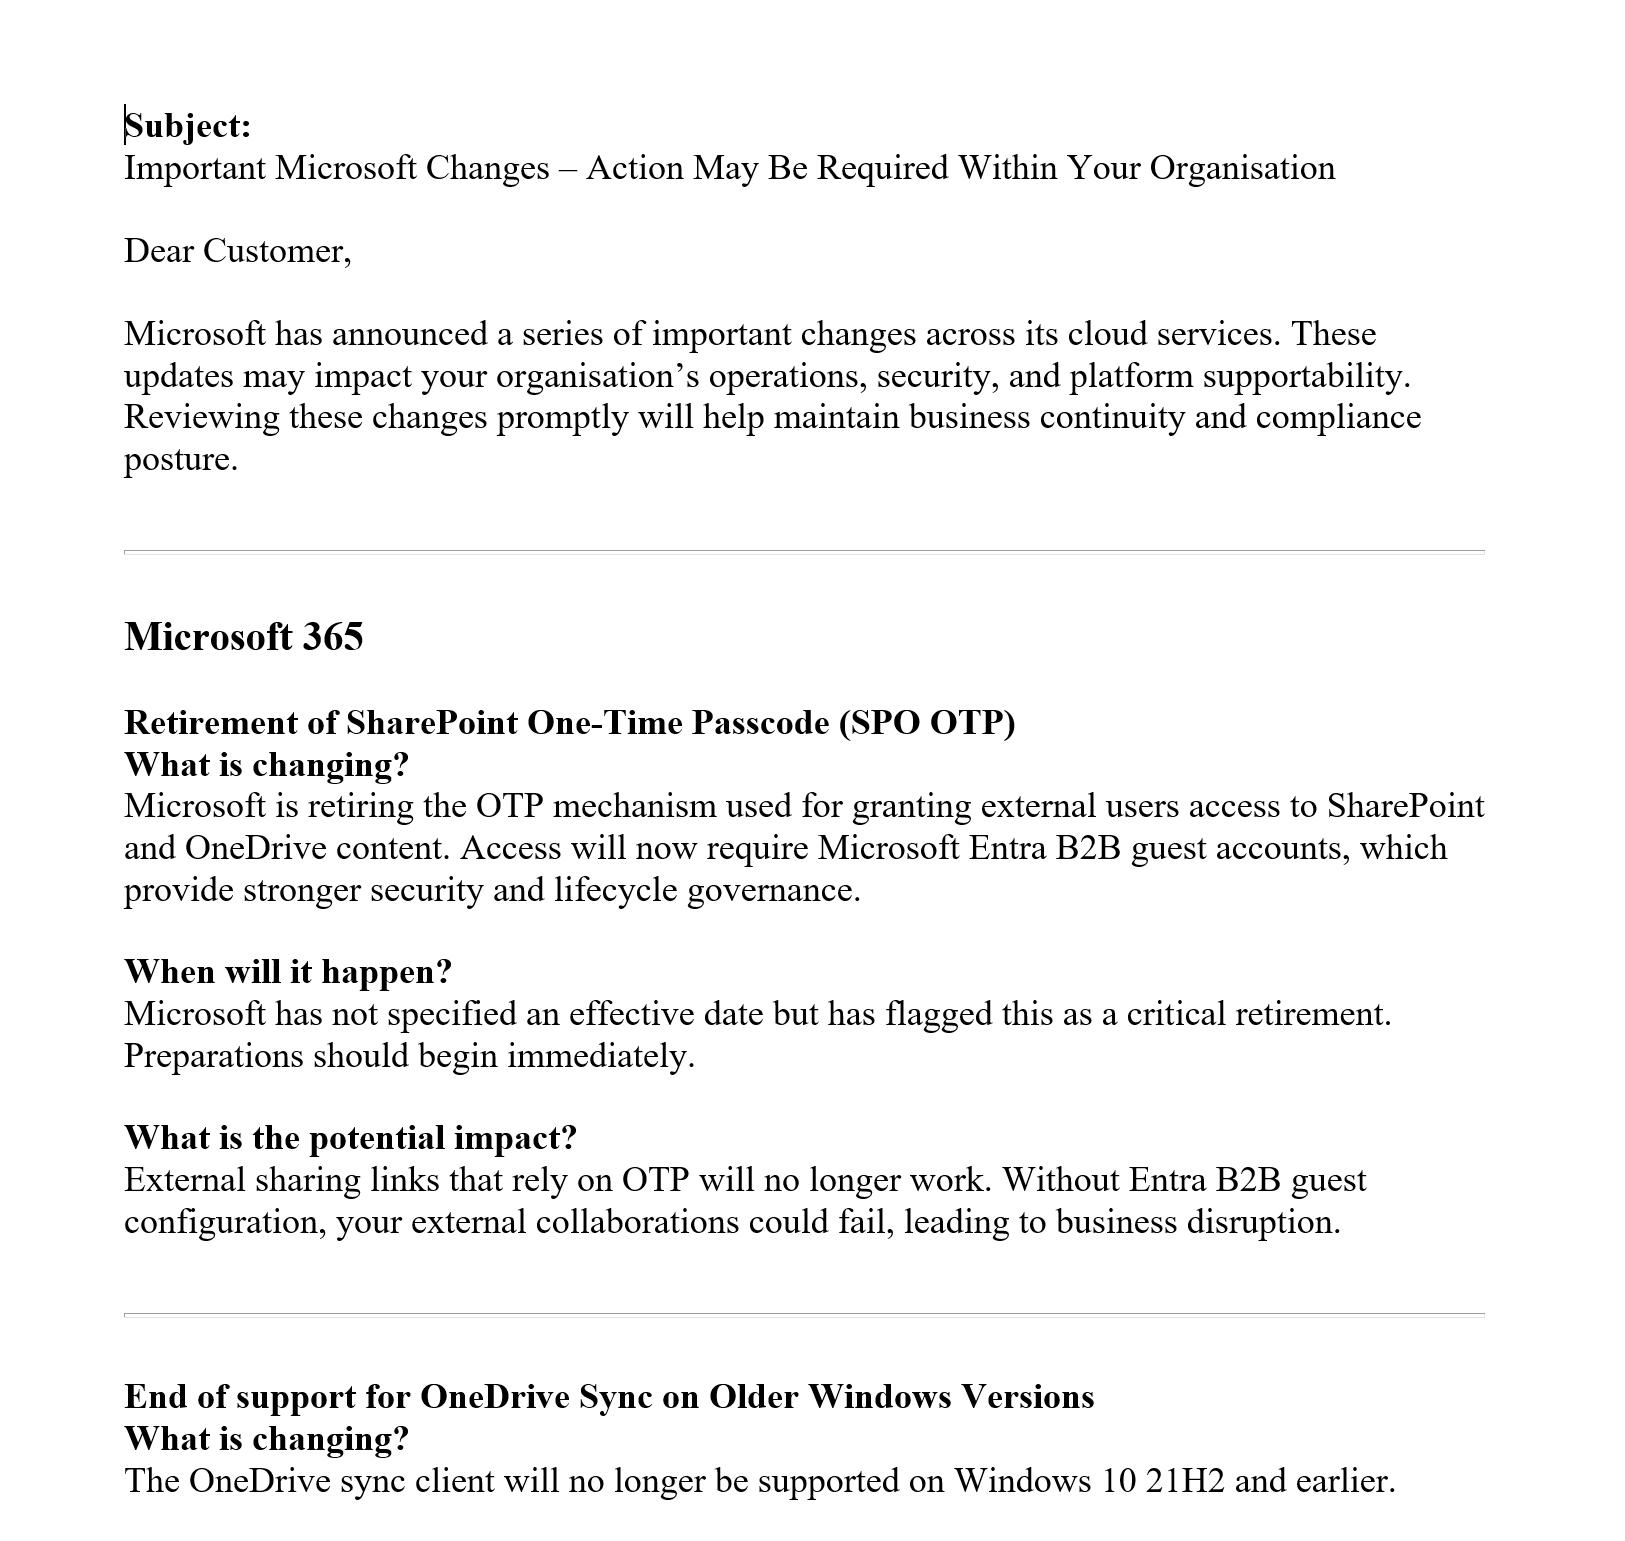
You can edit the document, save it, and send it on to customers.
Final Thoughts
This is a small workflow — two agents, a variable, and two output actions — but it removes a genuinely tedious recurring task from the calendar. Agent 1 does the research so nobody has to trawl the Message Center manually, and Agent 2 turns that into something presentable without a human staring at a blank page every week. Keeping a human review step before anything reaches a customer keeps the automation safe: the workflow drafts, a person still approves.