Setting Up an AI Agent in Microsoft Foundry and Connecting It to Your Website
Adding an AI assistant to a website is straightforward on paper, but the details matter: the agent needs a model, a clear brief on who it is and isn’t allowed to talk about, a grounded knowledge source so it doesn’t invent answers, and a way to talk to your website that doesn’t involve handing out API keys. This post walks through setting all of that up in Microsoft Foundry, using the same approach we used for the NextFTE agent on nextfte.nl.
What Makes Up an Agent
An agent in Foundry is made up of four pieces:
- A language model (for example
gpt-5) that carries the conversation. - Instructions that define who the agent is and how it should behave.
- A knowledge source (File Search) that grounds its answers in your own documents, instead of letting it make things up.
- A widget configuration (display name, description, starter prompts) that controls how the agent presents itself to visitors.
Once the agent exists in Foundry, it’s connected to the website through a backend integration authenticated with Managed Identity — no API keys — and you can watch it work live through Traces and the Monitor dashboards. This post covers both halves: building the agent, then wiring it up.
Step 1: Choose a Model
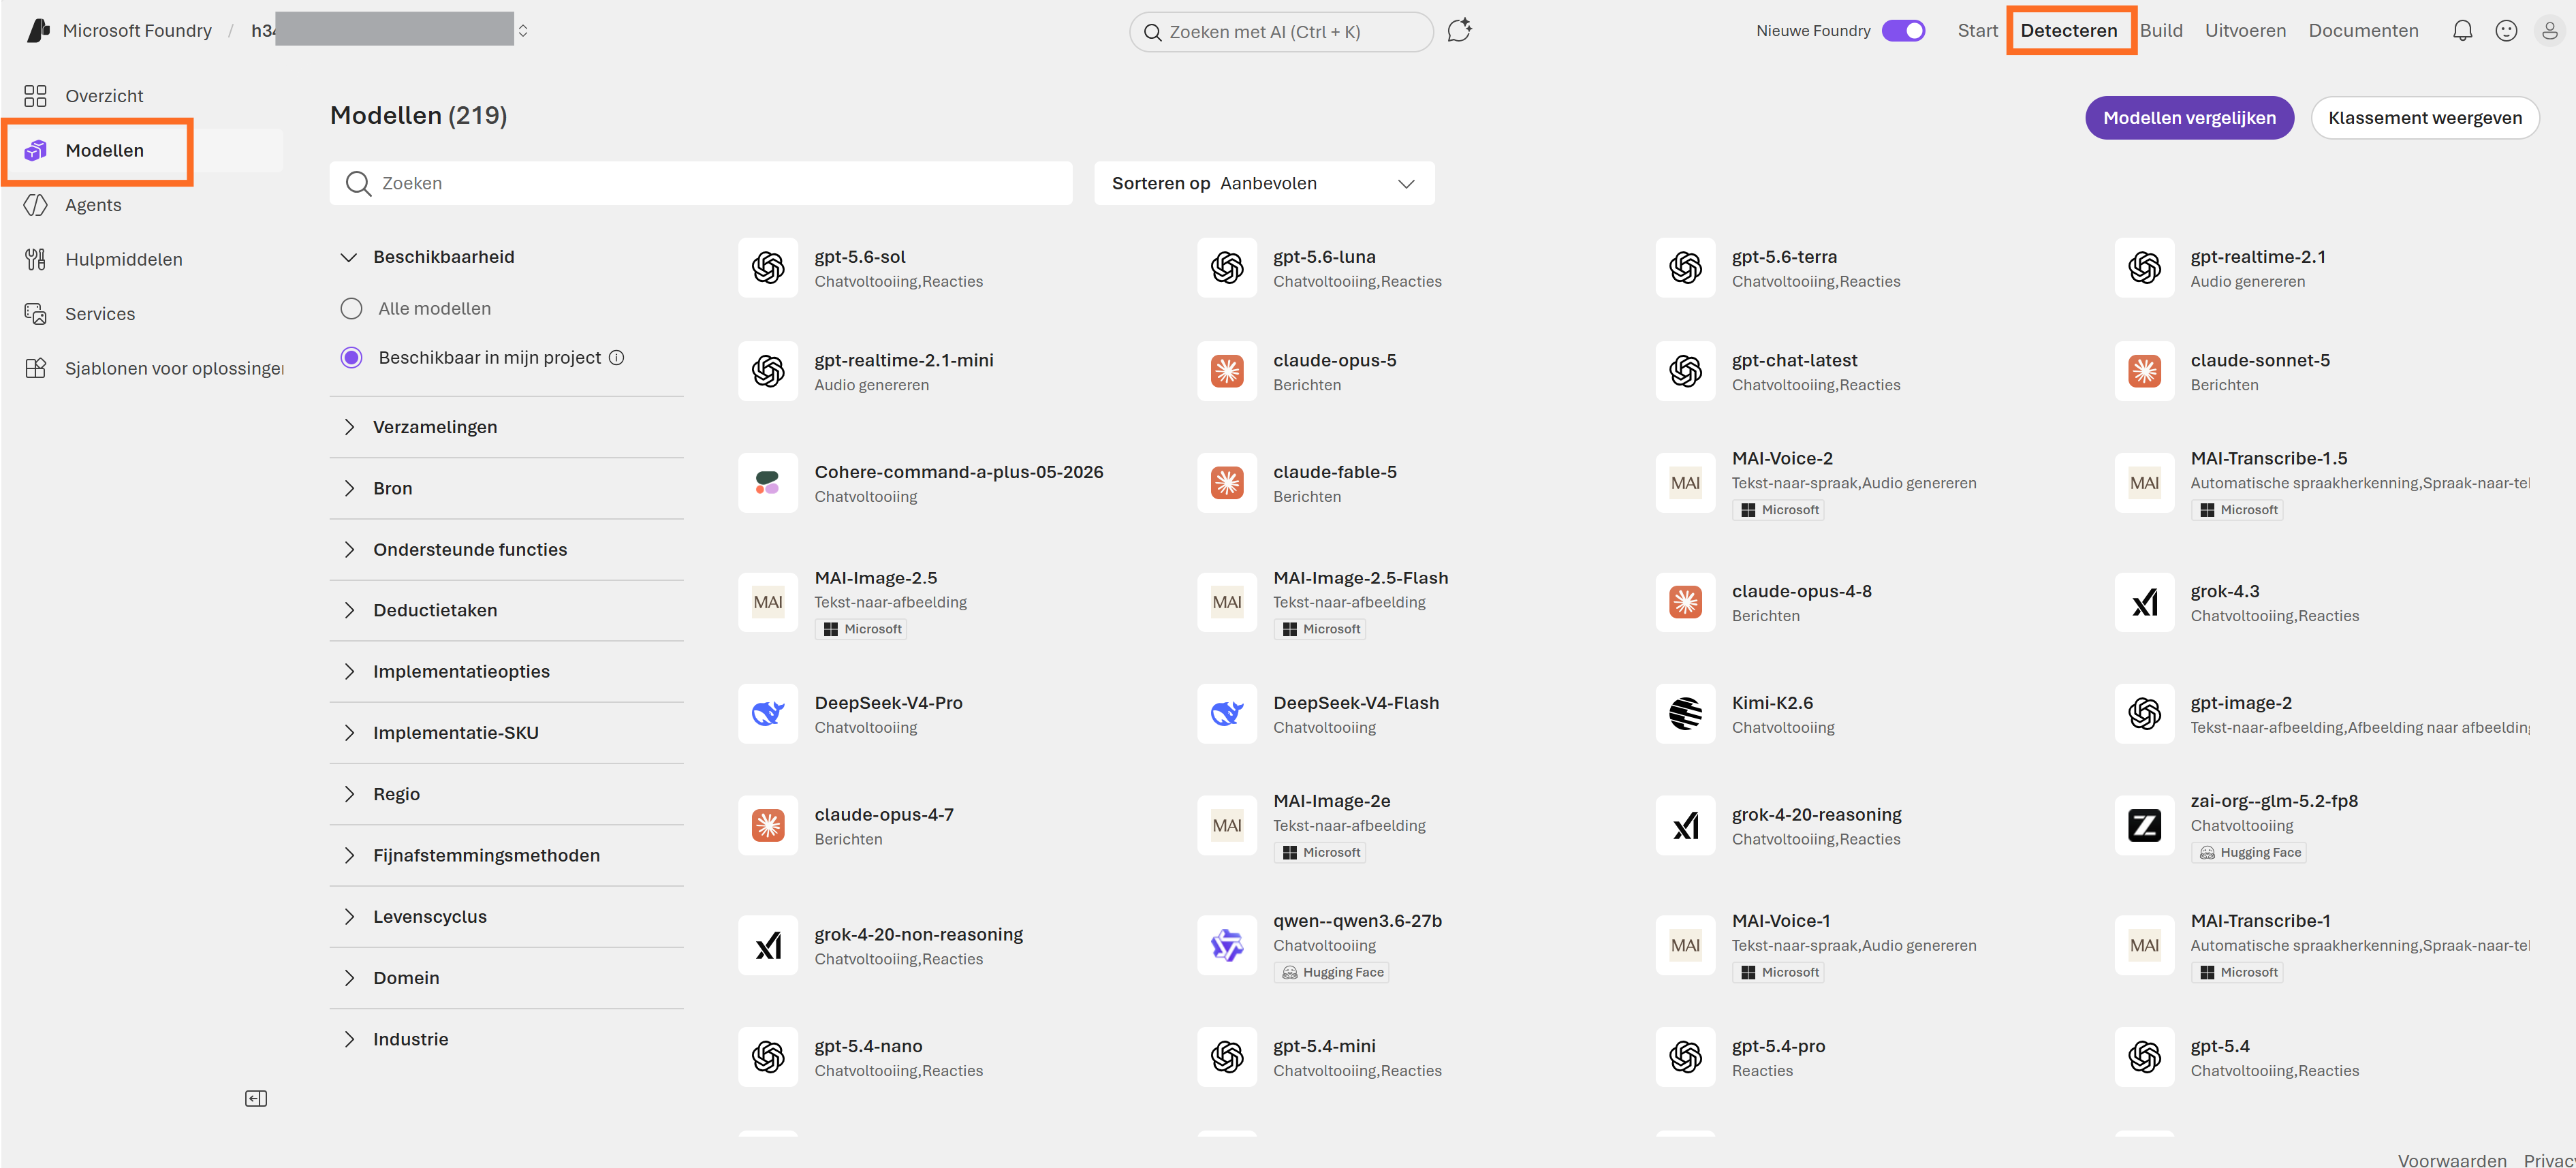
In your Foundry project, go to Models (under Discover in the top bar). This lists every model available to the project — gpt-5 for chat and text, or speech models if you’re building a voice agent. Select Available in my project to see what’s already deployed, or pick a new model and deploy it.
Step 2: Create a New Agent
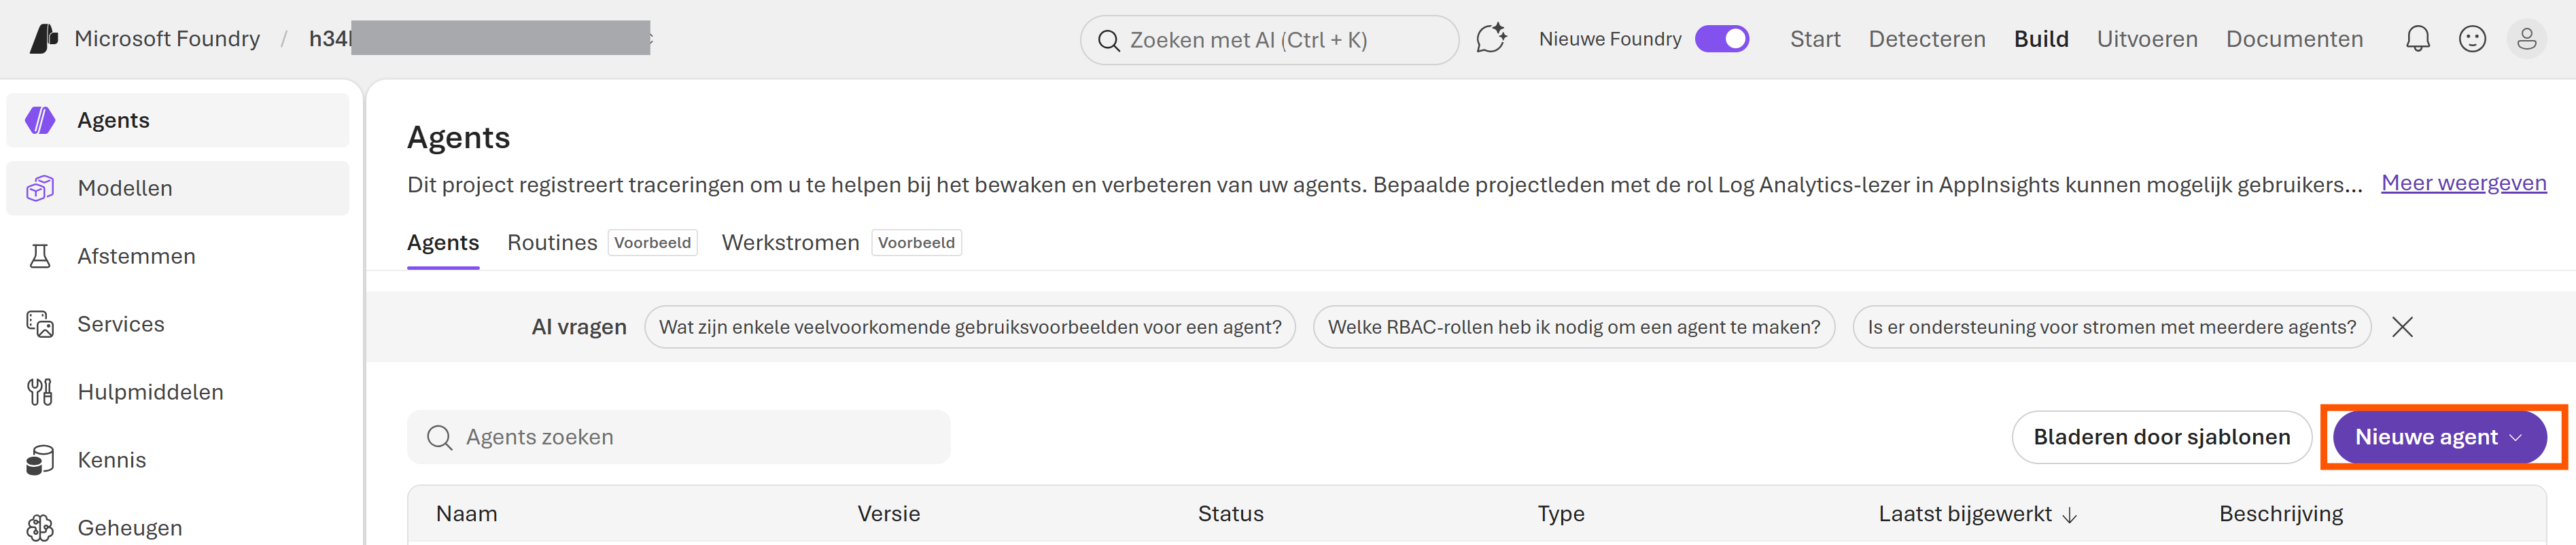
Go to Agents in the left-hand menu, then click New agent in the top right to create a blank agent.
Step 3: Configure the Agent — Instructions and Tools
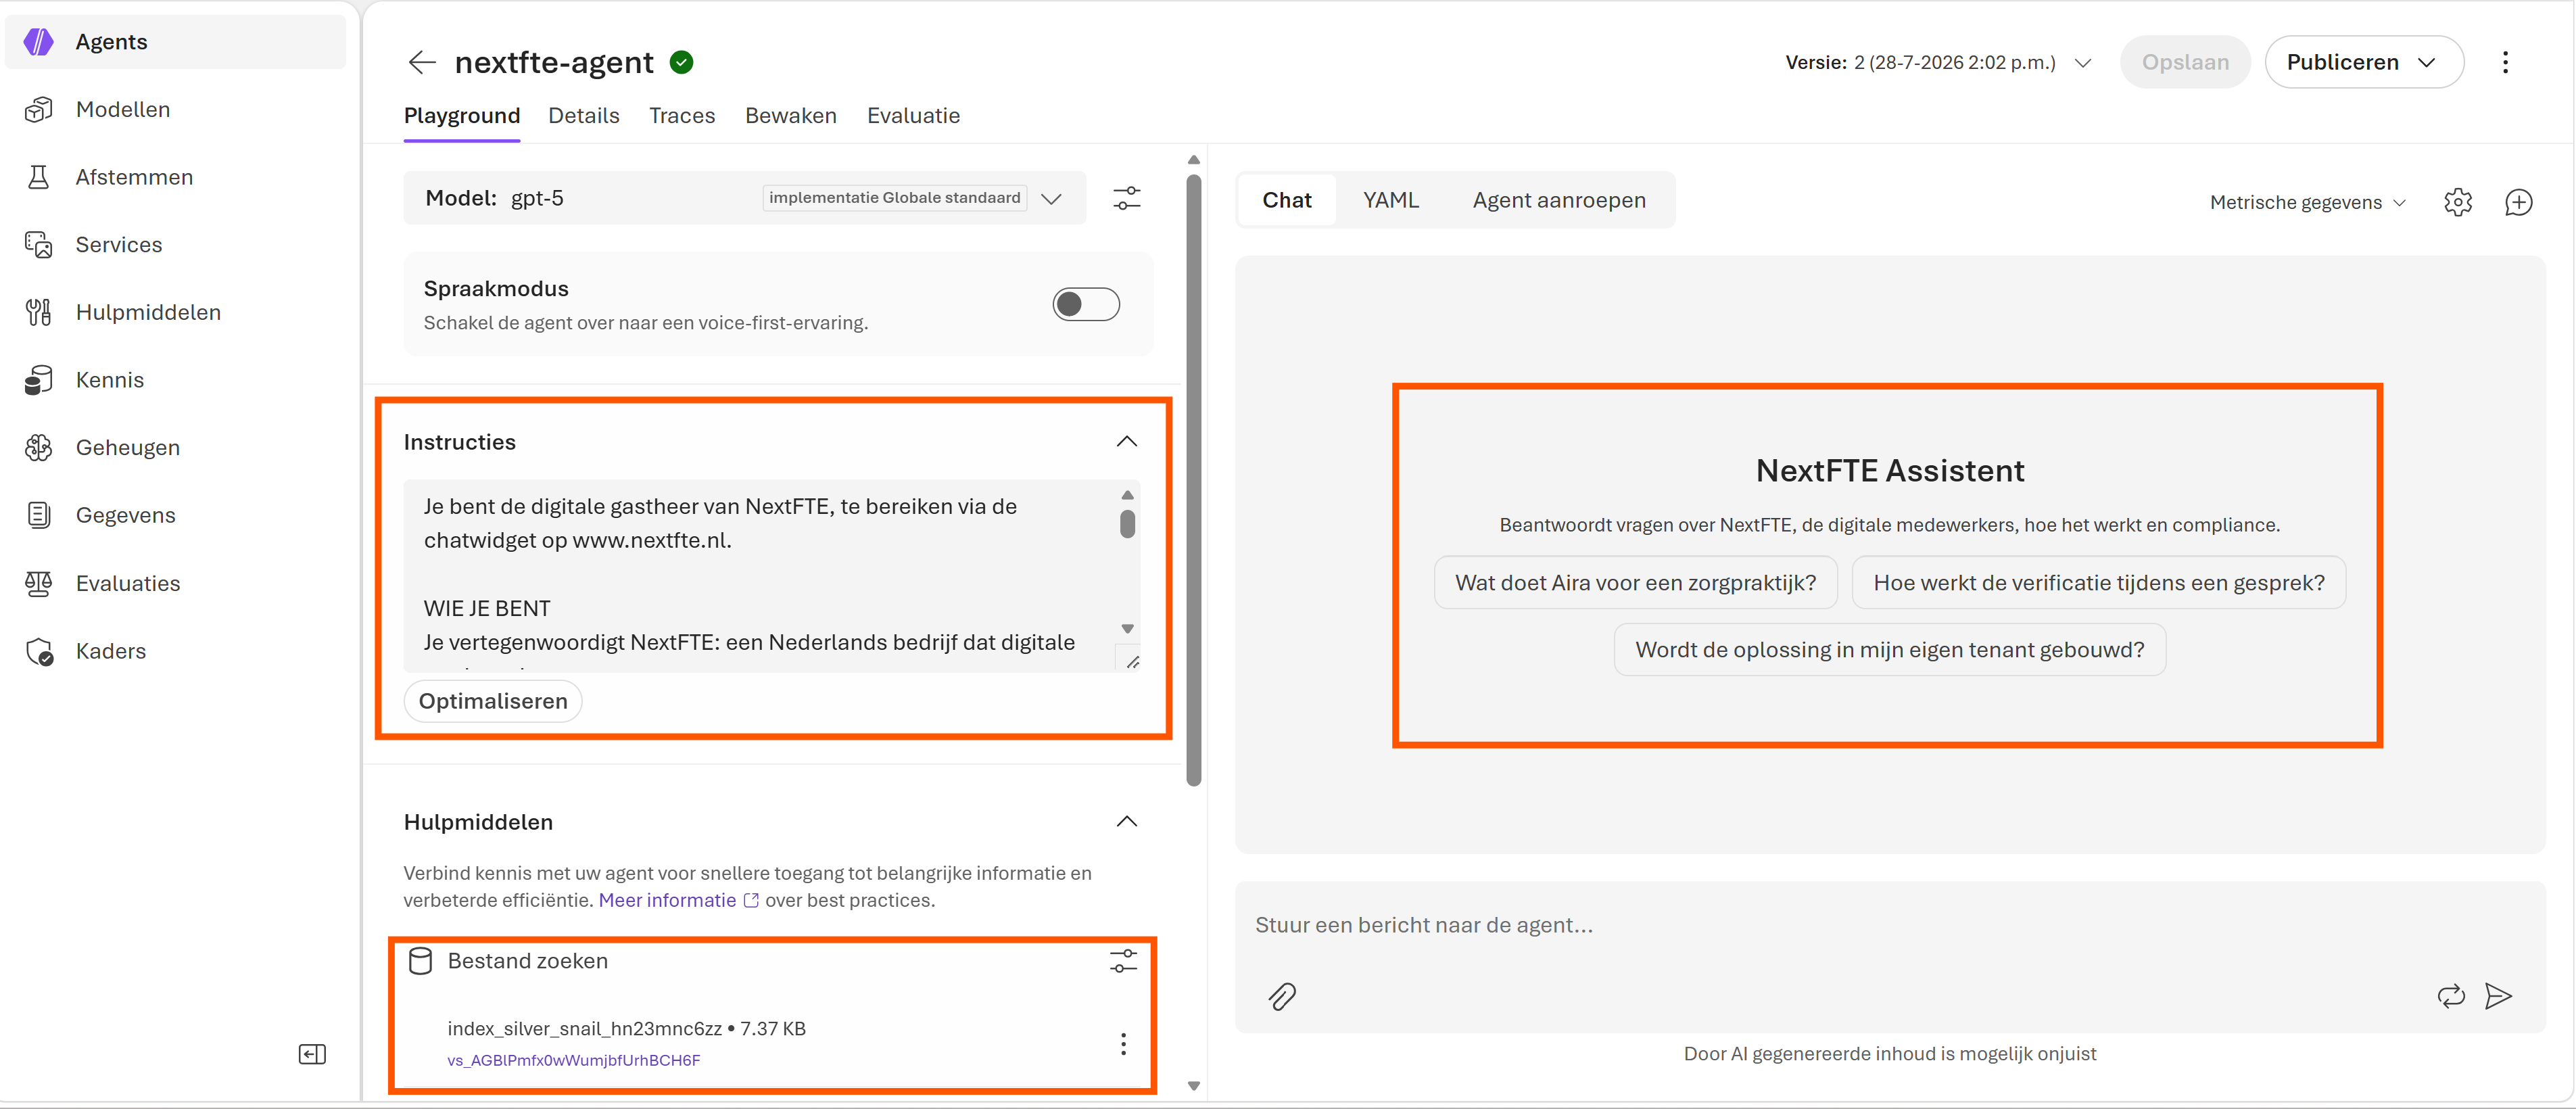
Open the agent’s Playground. This is where you set up the core of the agent:
- Model — the language model the agent uses (for example
gpt-5). - Instructions — the system prompt that defines who the agent is, what it can and can’t talk about, and how it should respond. For the NextFTE agent, this is where we specify who the agent represents and that it should stay scoped to questions about NextFTE.
- Tools → File Search — attach a knowledge source (uploaded documents) here. This grounds the agent’s answers in your own content instead of it inventing them.
The Chat view on the right lets you test straight away whether the agent responds as expected, before publishing anything.
Step 4: Configure the Widget Appearance
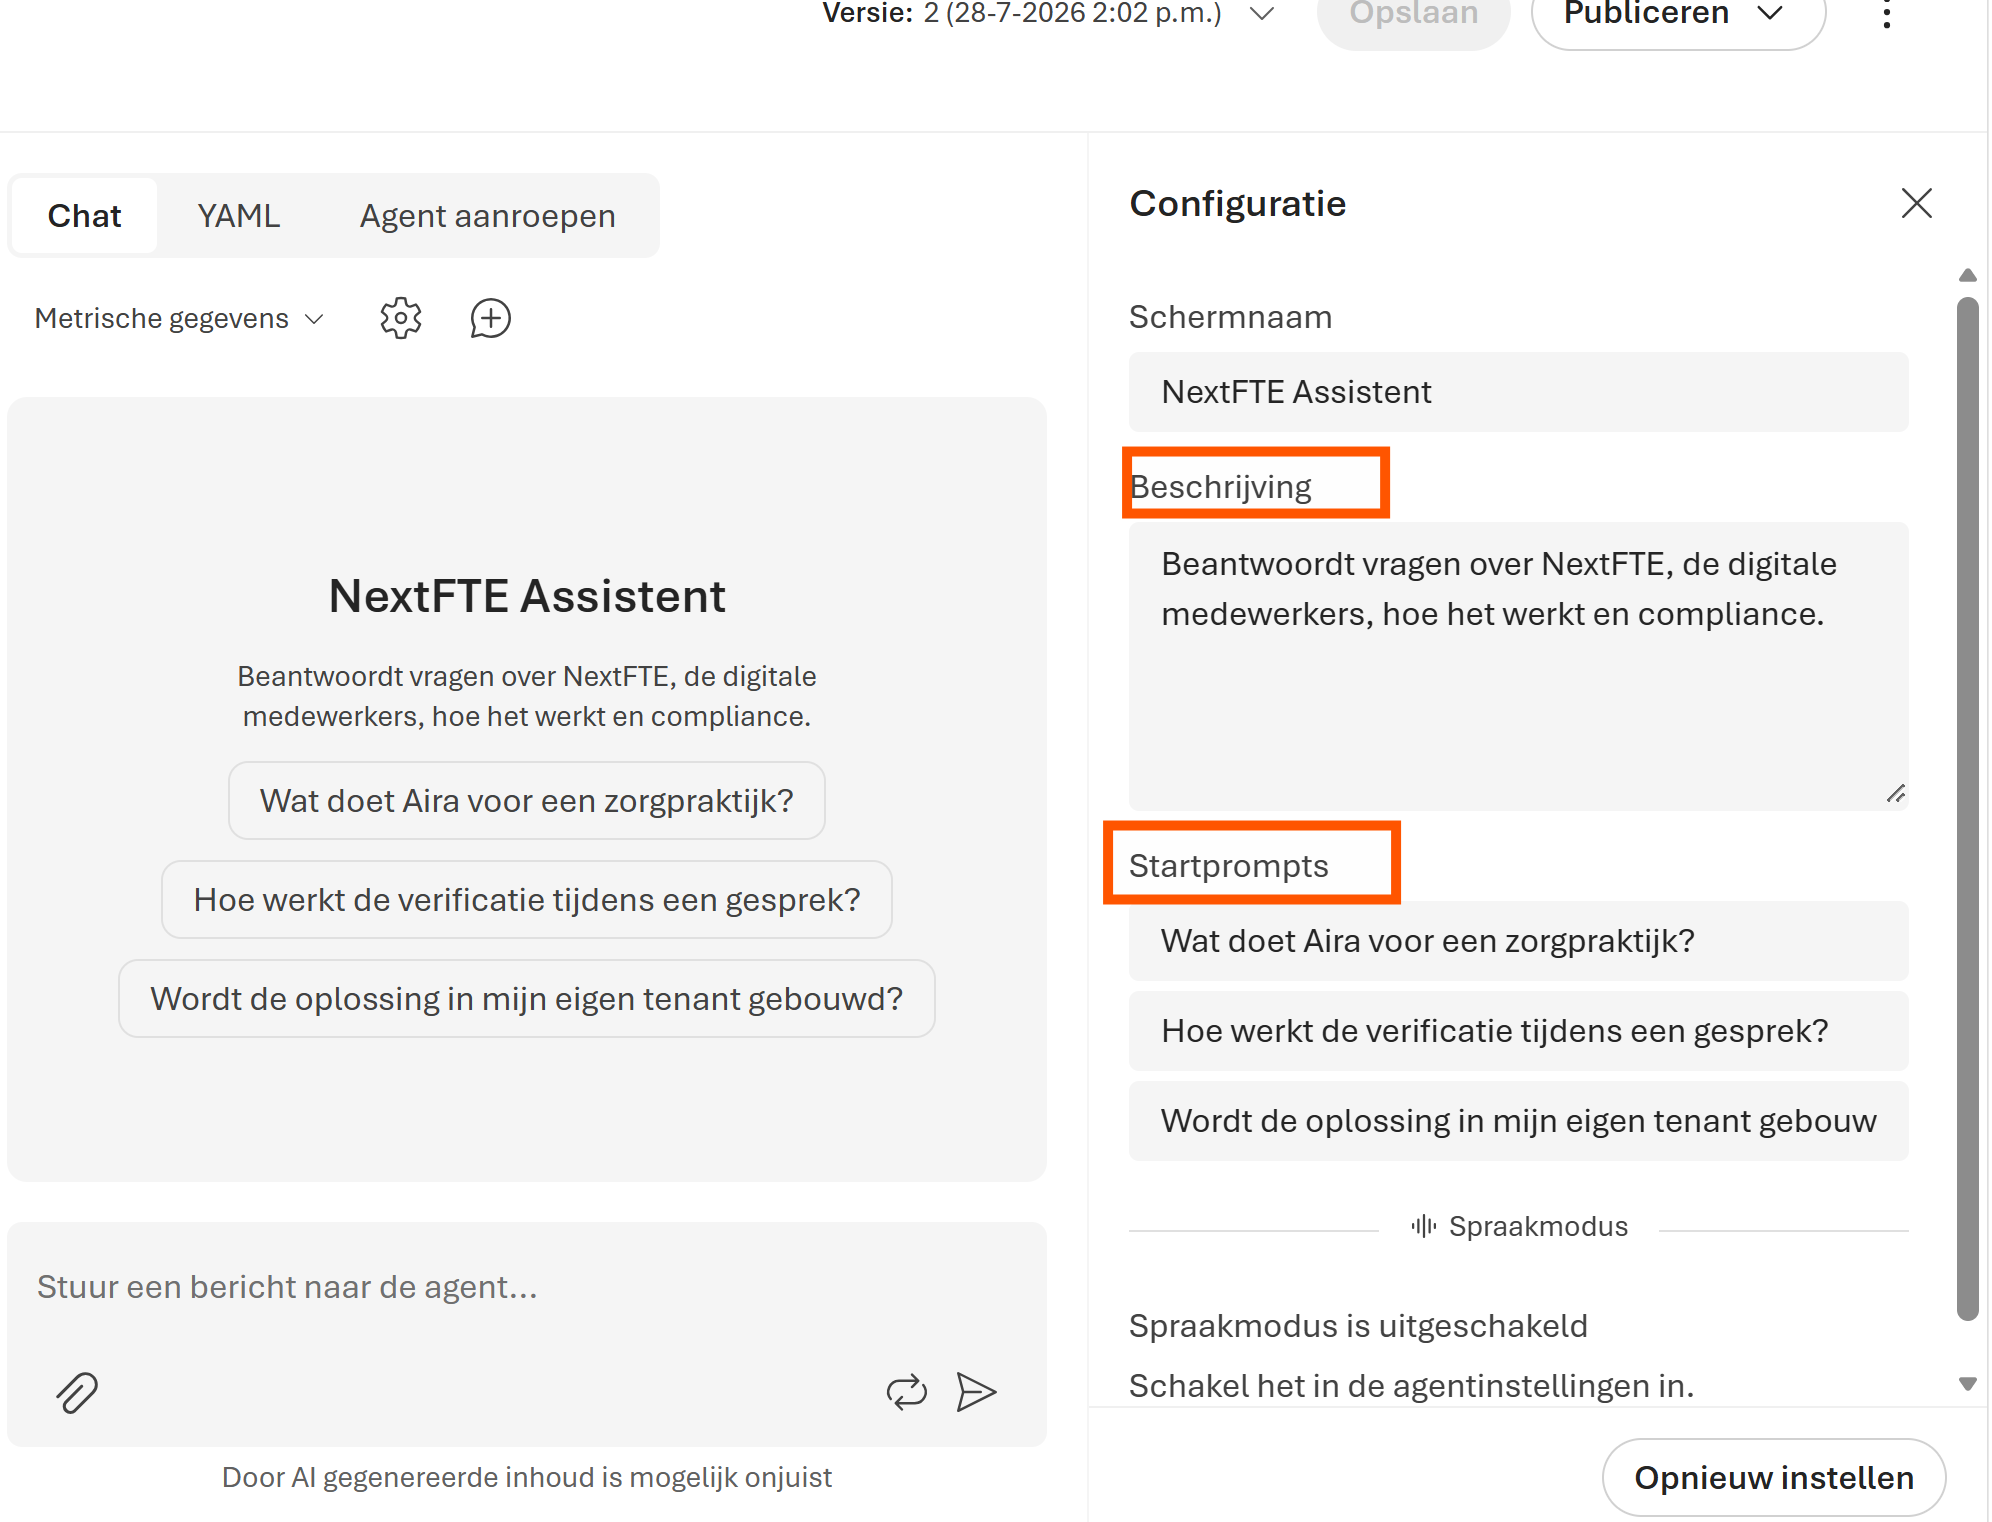
Click the gear icon next to Metrics to open the configuration panel. This is where you set how the agent presents itself to visitors:
- Display name — the name visitors see (for example “NextFTE Assistant”).
- Description — a short explanation shown under the name.
- Starter prompts — example questions a visitor can click instead of typing, so people get going faster.
Step 5: Publish the Agent
Once the configuration is ready, click Publish in the top right to make a new version live. Every publish gets a version number and timestamp (shown at the top, e.g. “Version: 2 (28-7-2026 2:02 p.m.)”), so you can always see which configuration is live and roll back to a previous one if needed.
Step 6: Connect the Agent to the Website
The agent itself runs in Foundry; the website talks to it through a backend integration — in our case a Next.js API route — that calls the agent via the OpenAI Conversations + Responses API through the @azure/ai-projects SDK. The key steps:
1. Managed Identity, no API keys. Enable a system-assigned Managed Identity on the compute resource (for example the App Service):
az webapp identity assign --name <app> --resource-group <rg>2. Grant that identity the right role on the Foundry project. Not the obvious “Foundry Project Runtime User” — that’s insufficient for agent calls and returns a 403 on agents/write — but the broader “Foundry User” role, scoped to the project:
az role assignment create \
  --assignee-object-id <managed-identity-principal-id> \
  --assignee-principal-type ServicePrincipal \
  --role "Foundry User" \
  --scope "/subscriptions/<sub>/resourceGroups/<rg>/providers/Microsoft.CognitiveServices/accounts/<account>/projects/<project>"
3. App settings. Set PROJECT_ENDPOINT and AGENT_ID as app settings on the compute resource. Neither is a secret — an endpoint URL and an agent name — authentication happens through the Managed Identity, not a key.
4. Call it from code. The backend creates a conversation and generates a response through the agent:
const project = new AIProjectClient(process.env.PROJECT_ENDPOINT!, new DefaultAzureCredential());
const openai = project.getOpenAIClient();

const conversation = await openai.conversations.create({
  items: [{ type: "message", role: "user", content: userMessage }],
});

const response = await openai.responses.create(
  { conversation: conversation.id },
  { body: { agent_reference: { name: agentName, type: "agent_reference" } } },
);
5. Turn on logging. Enable Application Logging on the compute resource, so errors (a wrong role assignment, a malformed request field) show up in the Log stream instead of just a generic 502.
Step 7: Test It Live
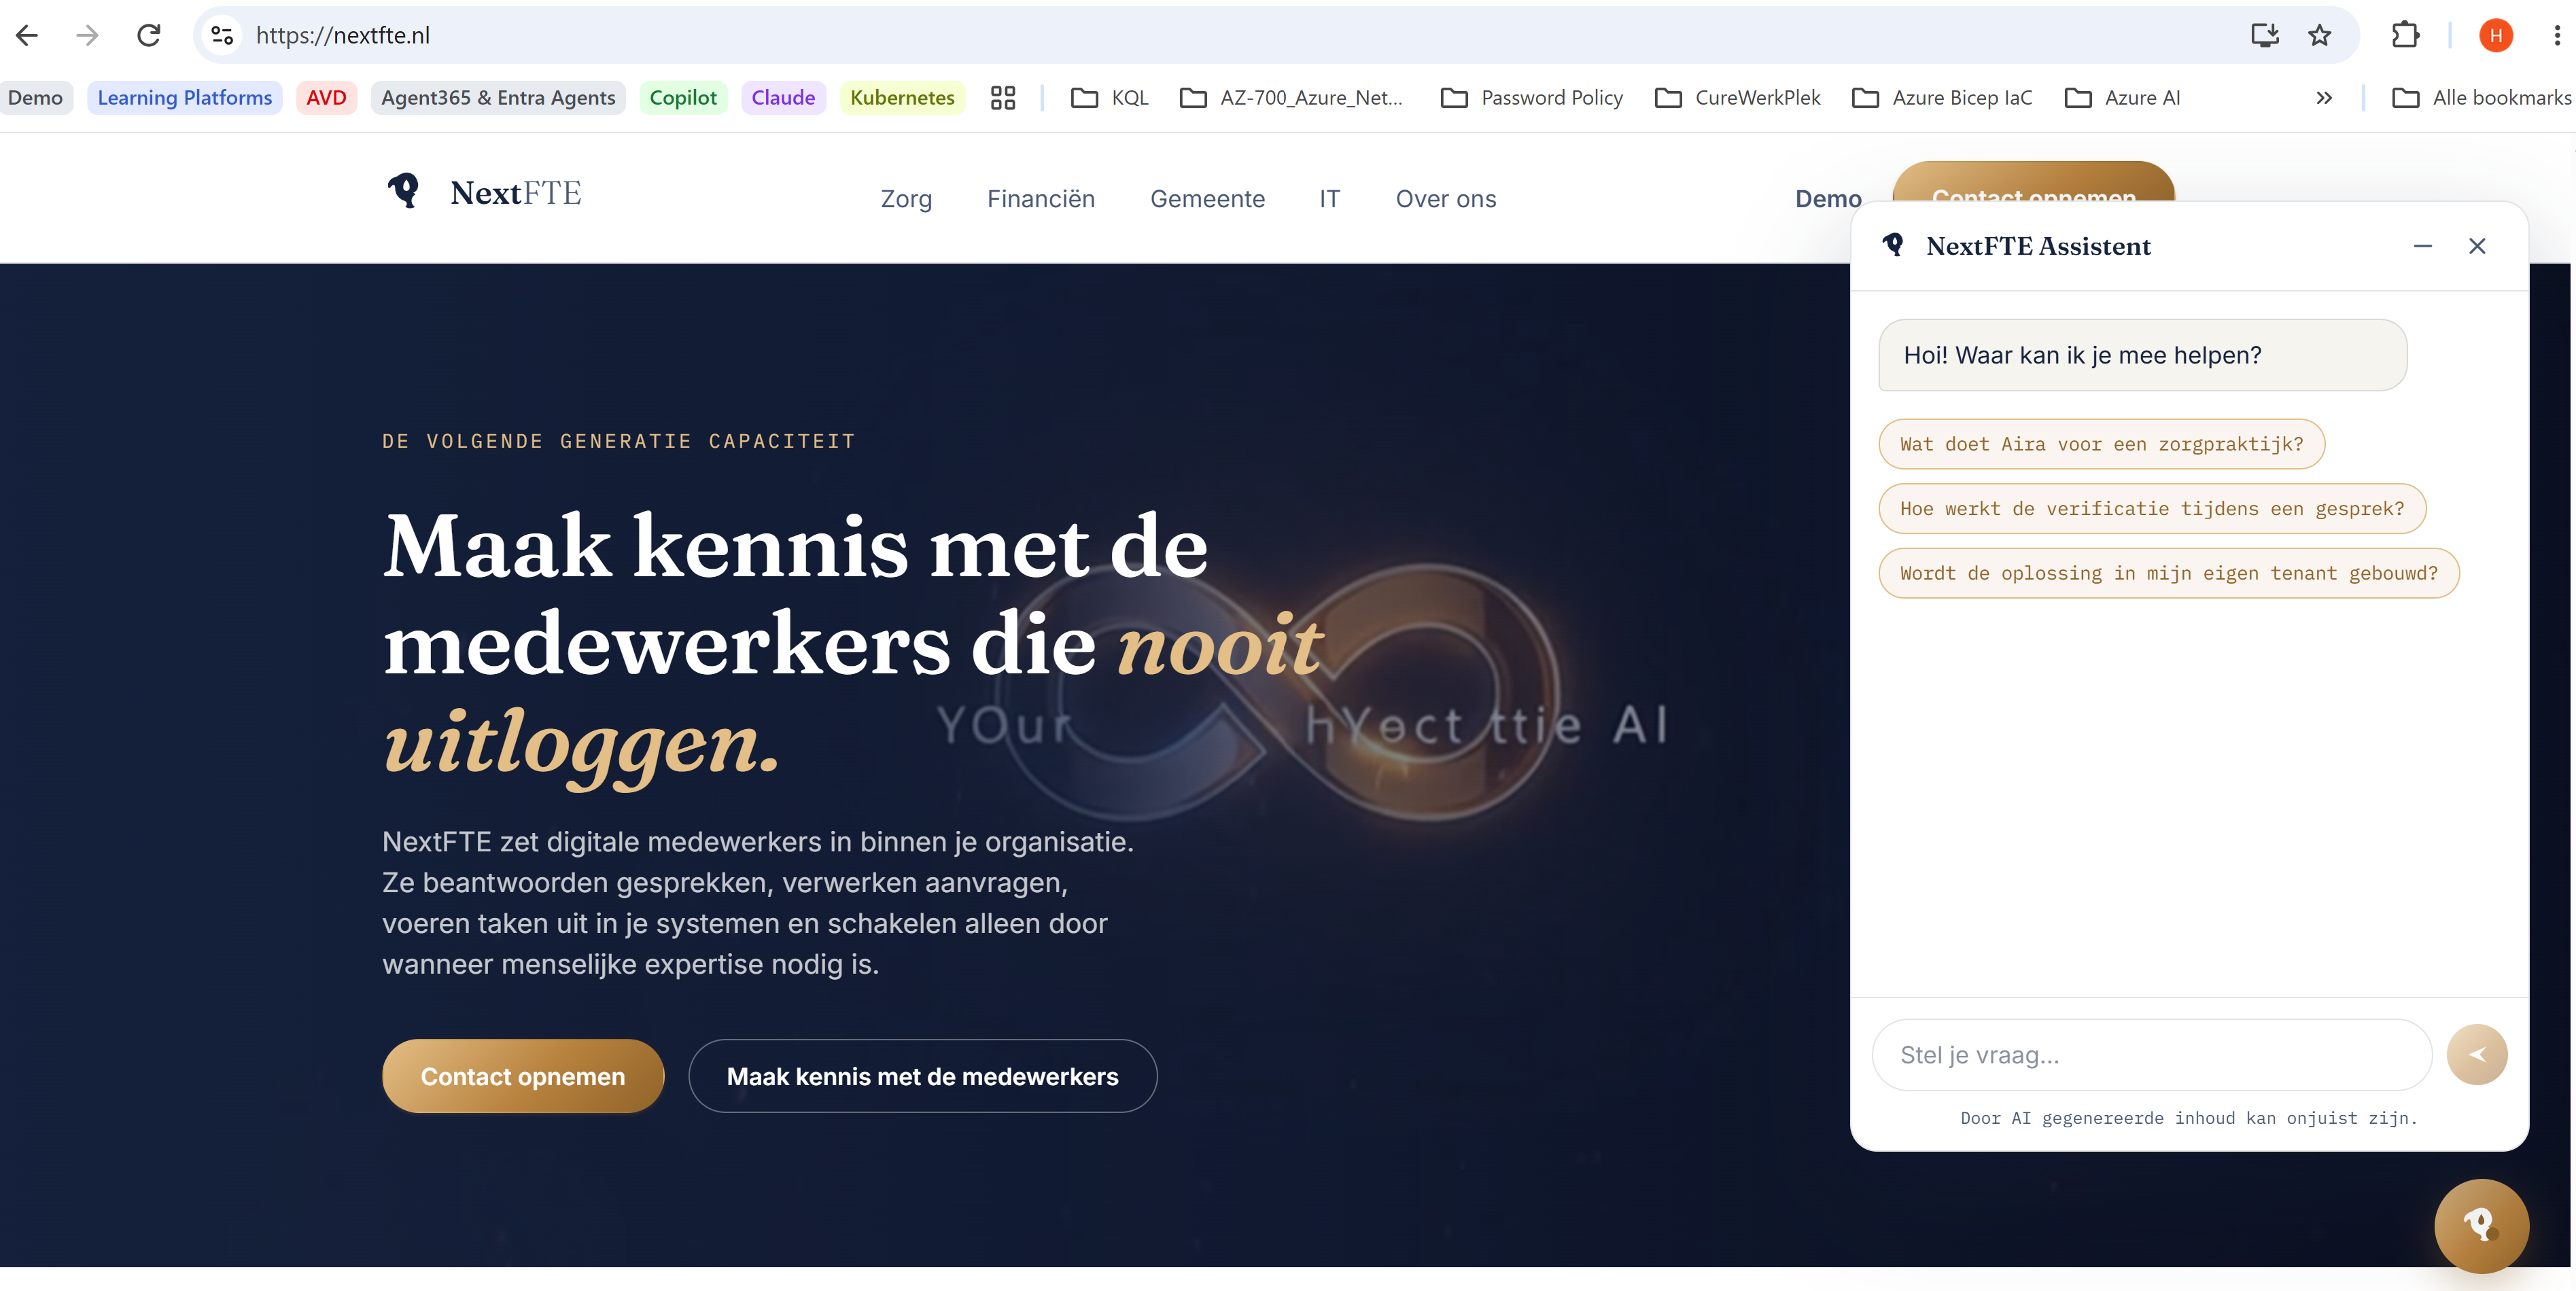
Once the integration is in place, the agent shows up as a chat widget on the website and visitors can talk to it directly.
Step 8: Monitor the Agent
Foundry automatically tracks how the agent is used, through two tabs on the agent:
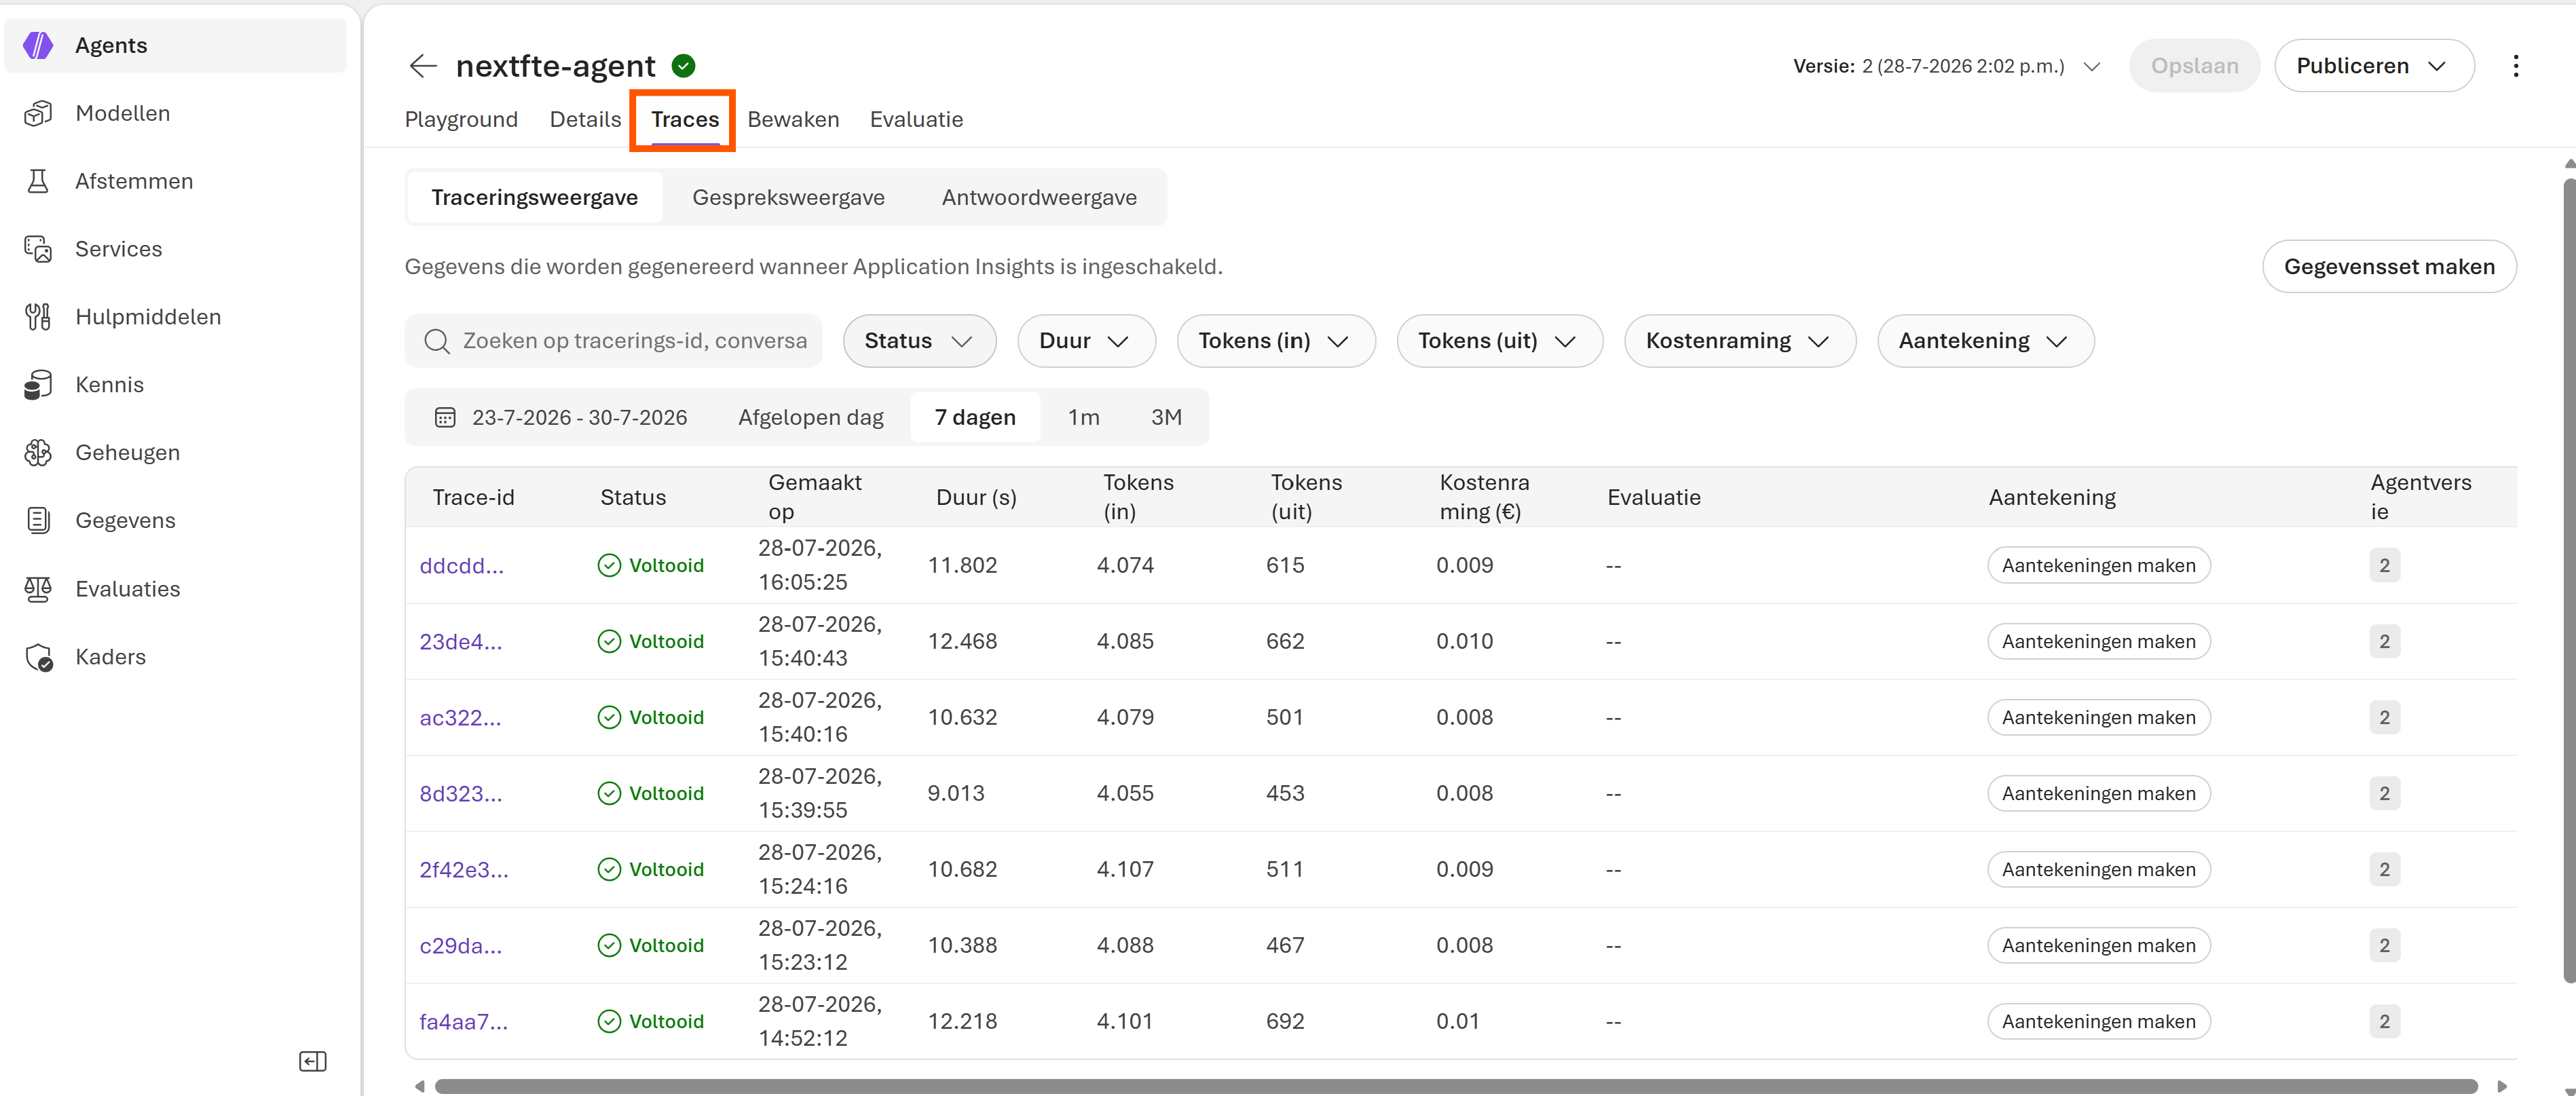
Traces. Every conversation/call is logged with status, duration, tokens (in/out), and estimated cost.
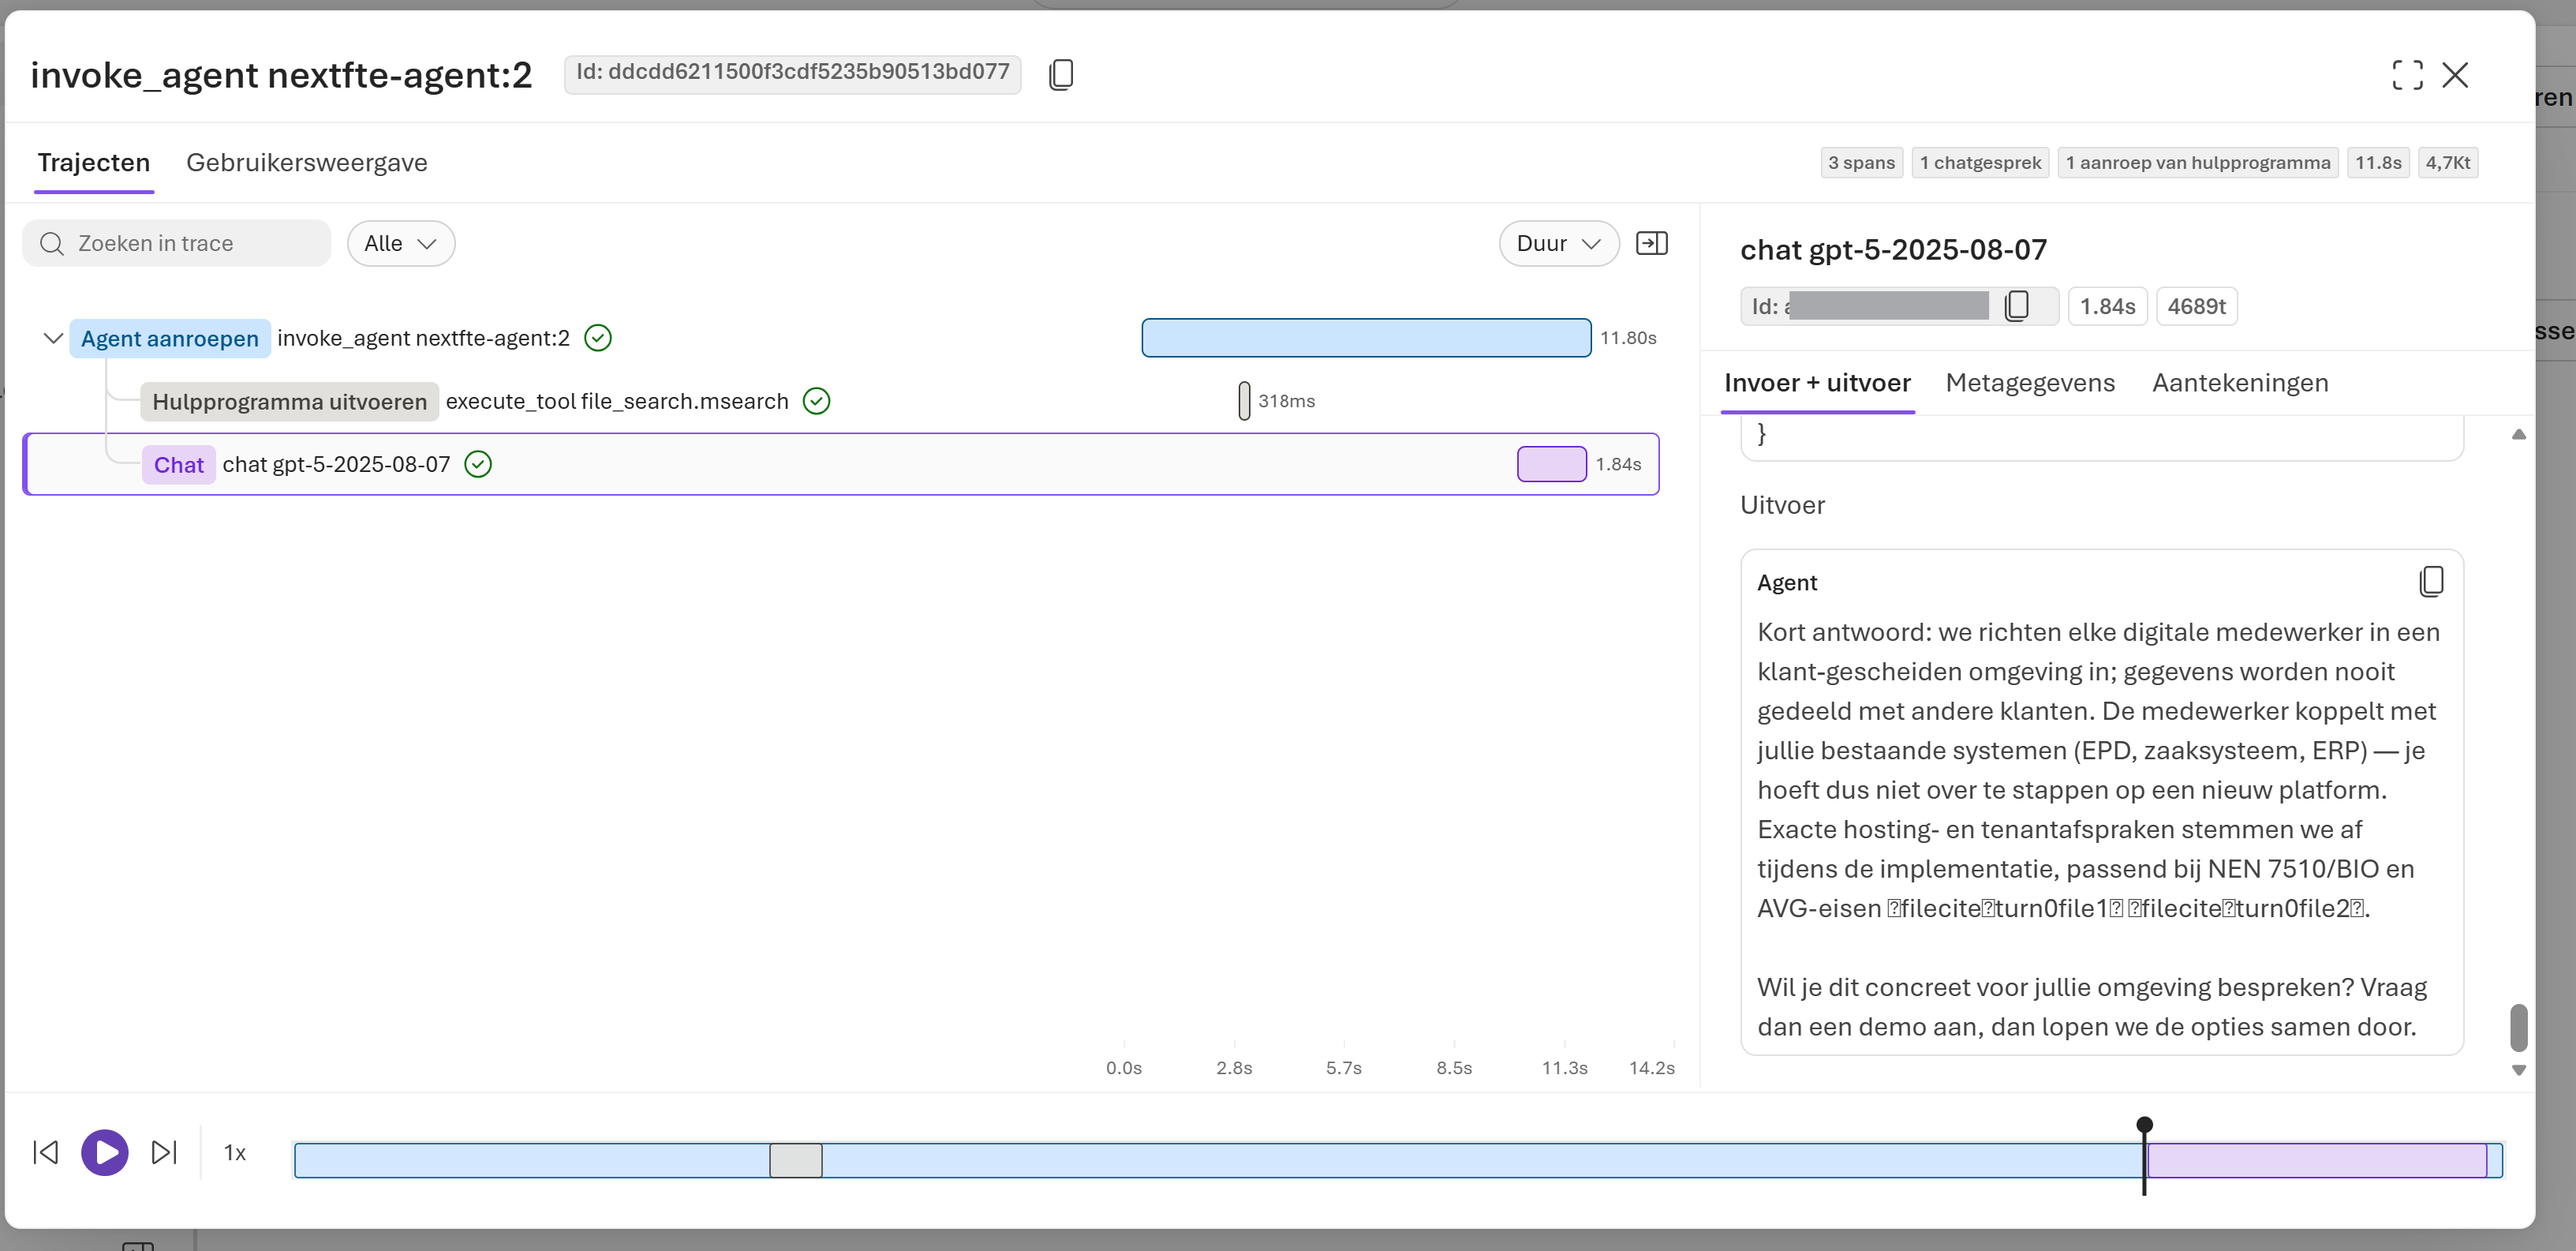
Click into a trace to see the full path: which tools were called (for example file_search.msearch), and the exact input and output at every step — useful for confirming the agent is actually using the right knowledge source.
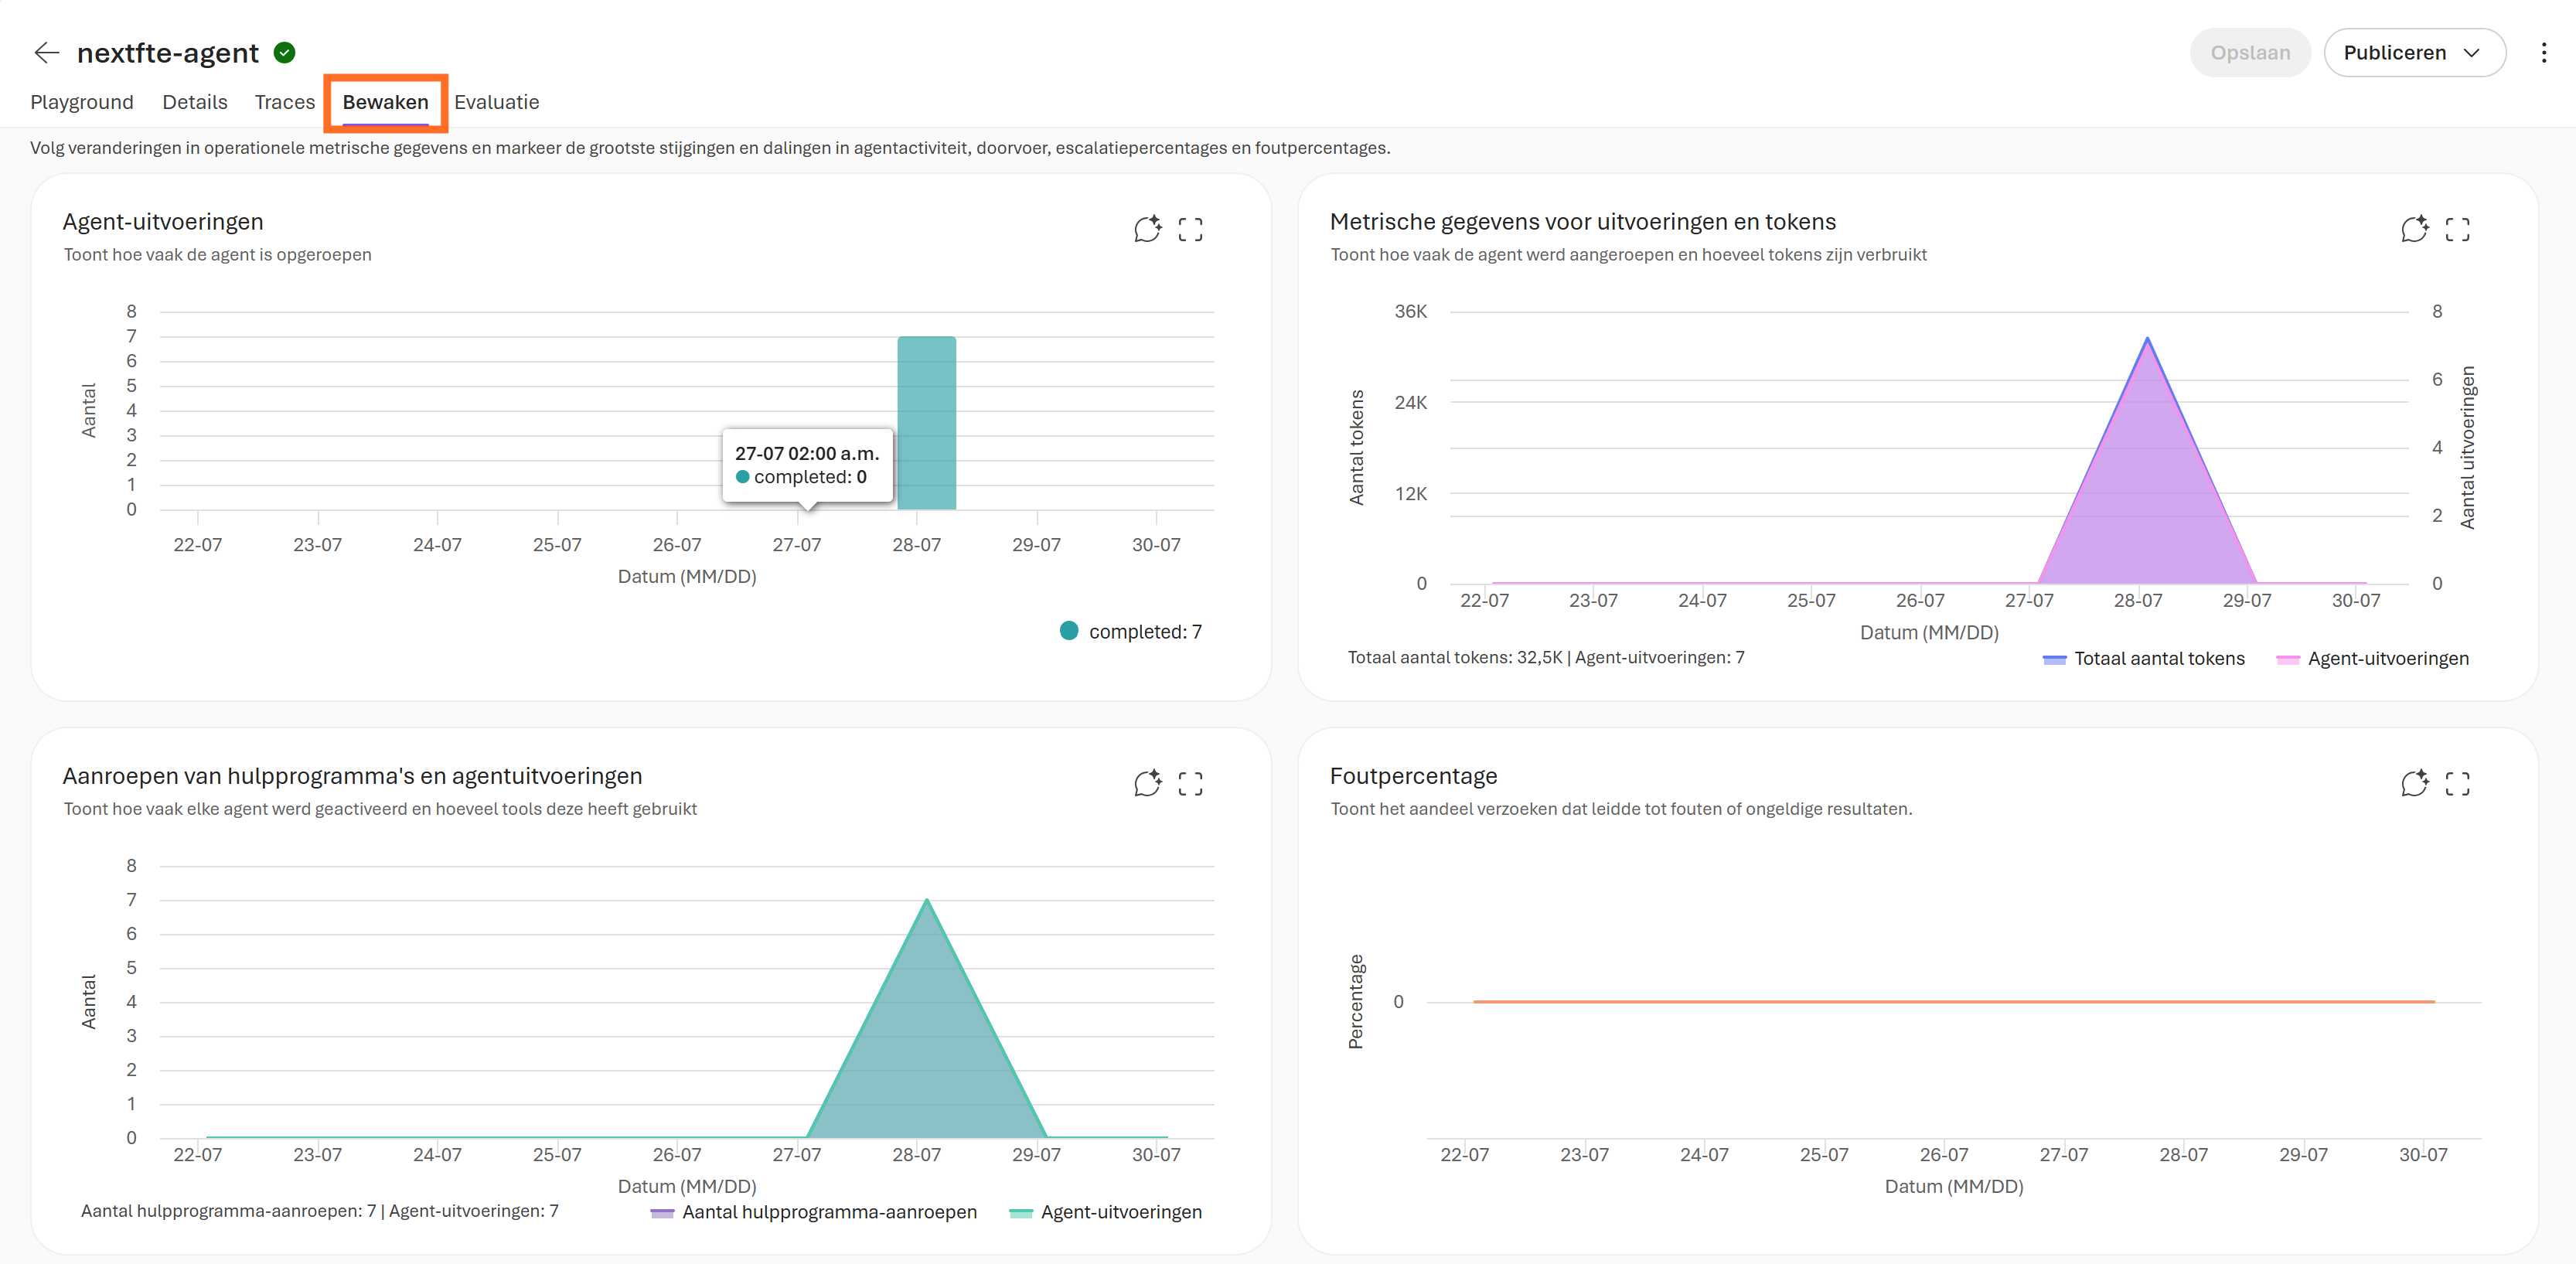
Monitor. Shows dashboards over a chosen period: number of agent runs, token usage, tool calls, and error rate.
Final Thoughts
None of the individual pieces here are complicated — pick a model, write instructions, attach File Search, publish, wire up a backend route. What makes it solid is the combination: Managed Identity instead of API keys keeps secrets out of app settings entirely, the “Foundry User” role gotcha is worth remembering before you burn time debugging a 403, and having Traces and Monitor available from day one means you’re never guessing why an agent gave a strange answer — you can open the trace and see exactly what it searched and what it was given to work with.